Ingrid - Sew Along. Getting Started
Hello and welcome to our first sew-along. We hope you have fun sewing Ingrid with us.
Today, we are taking an overall look at Ingrid and what you will need for the project.
The rest of the week looks like this:
Day 1 – Getting Started. Supplies and Kit
Day 2 – Sizing and Pattern Adjustments
Day 3 – Cutting and Preparing your Panels
Day 4 – Sewing: Bodice and Skirt Panels
Day 5 – Finishing up: Attaching Facings and Sleeves
All of the sew-along posts will stay live on our blog for you to reference any time you are working with Ingrid.
Ingrid
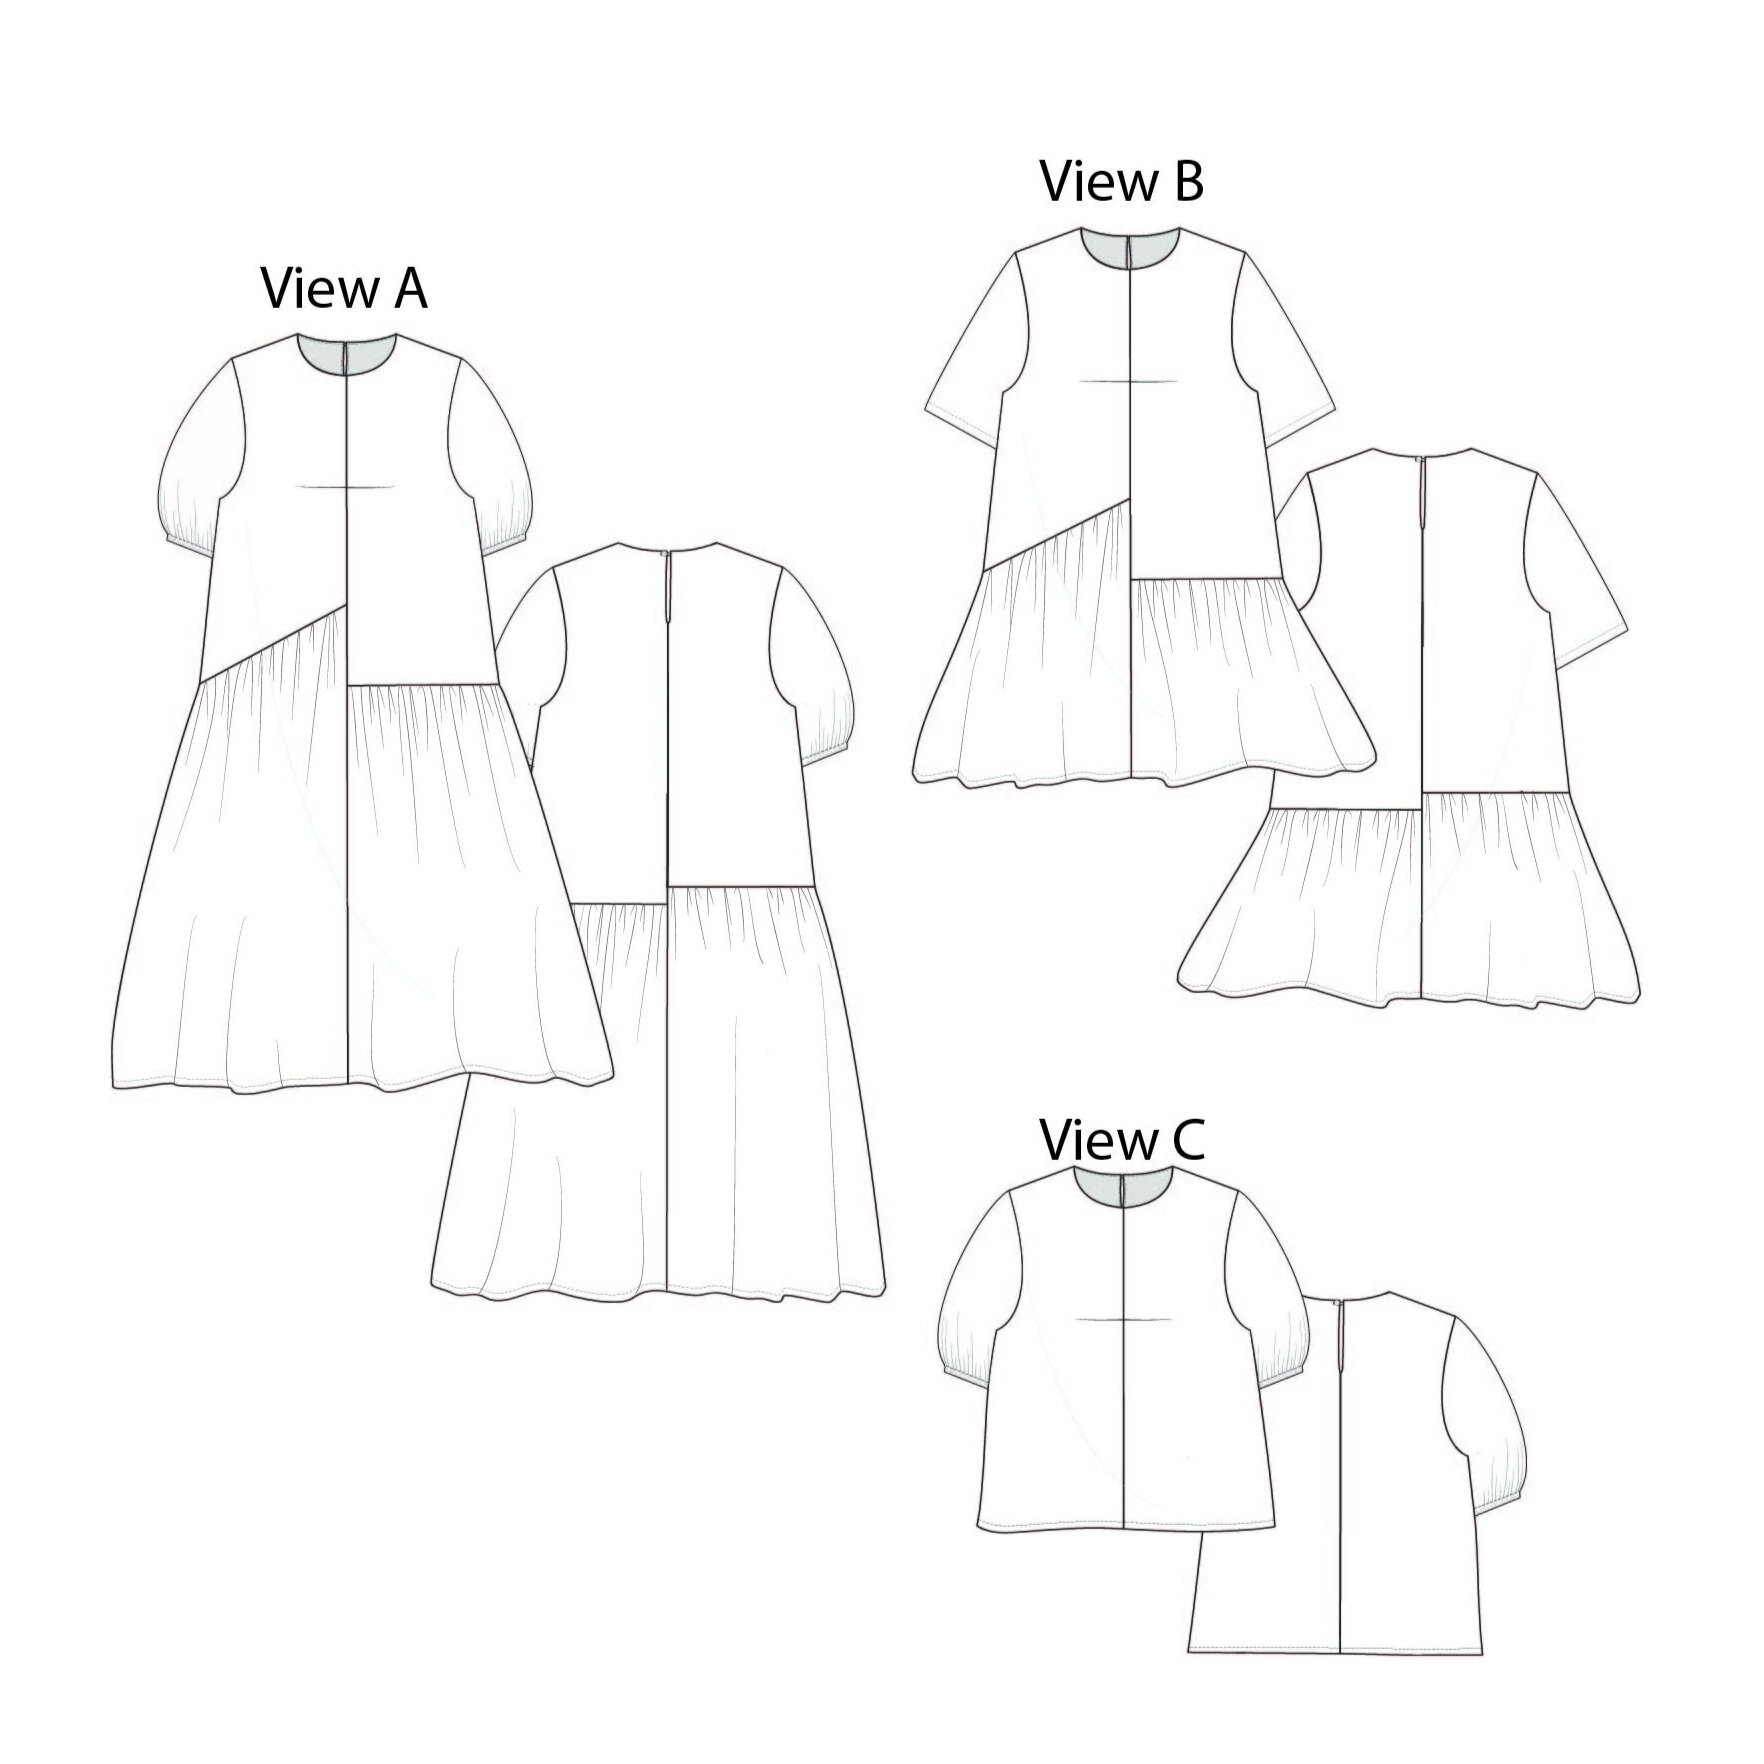
Our Ingrid pattern comes with 3 views. An asymmetric panel dress, in mini or midi lengths. And a classic crew neck top.
Ingrids, sculptural bust-tuck adds shape to the easy fitting bodice of both the dress and top. The dresses have asymmetric skirt panels with soft gathers and deep generous pockets, as all dresses should.
The sleeve options from the different views are interchangable, you can select from a Tee style sleeve, or a voluminous sleeve with elasticated cuff.
View A - MIdi dress with full sleeve
View B - MIni dress with classic tee sleeve
View C - Top with full sleeve
Sewing level:
Dress Views A + B – Intermediate
Top View C – Confident beginner
There is no one complicated technique within Ingrid, each step itself should be a breeze for intermediate sewists. As the dress is asymmetrical, each panel is unique, therefore careful cutting (and labelling!) is needed to keep your project problem-free.
If you are a confident beginner, Ingrid is absolutely within your reach if you take your time and make sure to follow each step in the instruction booklet.
Supplies and Kit
Before starting on Ingrid you will need to gather the following supplies:
You will need a sewing machine and a good Iron. Either an overlocker OR the zig-zag stitch on your sewing machine.
From your sewing kit, you will need; paper scissors for cutting your pattern and sheers or a rotary cutter for your cloth. Pins, patterns weights, snips, tailor’s chalk/fabric marking pen, and a tape measure. A tailors ham (or rolled-up towel) is not essential but will make pressing easier.
Trims
Loop – 10cm elastic cord for the keyhole button loop. *alternatively follow the instructions and pattern piece supplied to make a rouleau loop in self fabric
Button – 1 x button. Around 12mm to 20mm (3/4”)
Fusing – 35cm / ½ yard of lightweight fusible interfacing
Cuff Elastic for view’s A + C - You will need around 0.9m / 1yd of a narrow elastic, we recommend 0.5mm wide
Extras - Safety pin or long bodkin for pulling the elastic through the cuff channel and of course matching thread.
Fabric
For this sew along I am using an Organic Cotton Denim, from Bawn textiles. This is an excellent choice for Ingrid, as would any denim up to around 8oz be.
We suggest sewing Ingrid in cotton lawns, poplin, linen, chambray, taffeta, fine cords or any mid weight structured fabric.
Depending on your size and which view you are making, you will need between 1m and 3.8m (1.5yd – 4 1/8 yd) of fabric.
You can check the fabric requirements for each View below or inside your Tech pack + Instructions that you received with the pattern.
Now that you have your fabric and supplies ready, grab a copy of our Ingrid pattern, as a PDF download or Paper pattern.
See you tomorrow for Sizing and Fit!


