Ingrid - Sew Along - Day 3
Today we will cut and begin sewing Ingrid.
For this sew-along, I am making View A – Midi dress with full sleeves and elasticated cuffs. If you are sewing View B, you can follow along with all details, except you must cut the shorter hemline marked on the skirt panels. And use pattern piece 7 for the sleeves.
For those of you sewing view C, you can skip all of the skirt panels and gathering. You cut the left front and back bodices as pairs.
To make sewing easy with Ingrid it’s important to take your time with cutting and to label each panel so that you can easily identify which panel goes where later.
Cutting
Lay your washed and pressed fabric out right side up. Refer to the cutting lay page for each View within the instructions before going ahead with cutting.
The right and left-hand side panels are different from each other on the dress views A and B. When cutting these as a single layer, your fabric should be right side up (RSU)
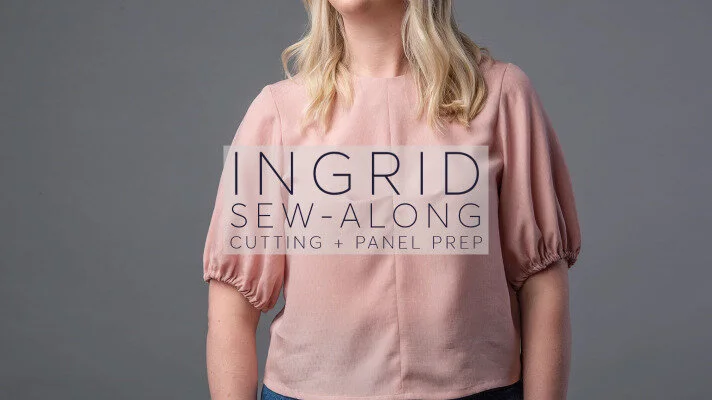
Panel 3, back bodice, and 4, right skirts have horizontal fold lines on them. For these panels, cut 1 RSU (right side Up), then using the same pattern piece, fold along the horizontal line before cutting a second panel, WSU (wrong side up) - as shown with panel 3 below:
Cut 1 x panel 3 with your cloth RSU as above
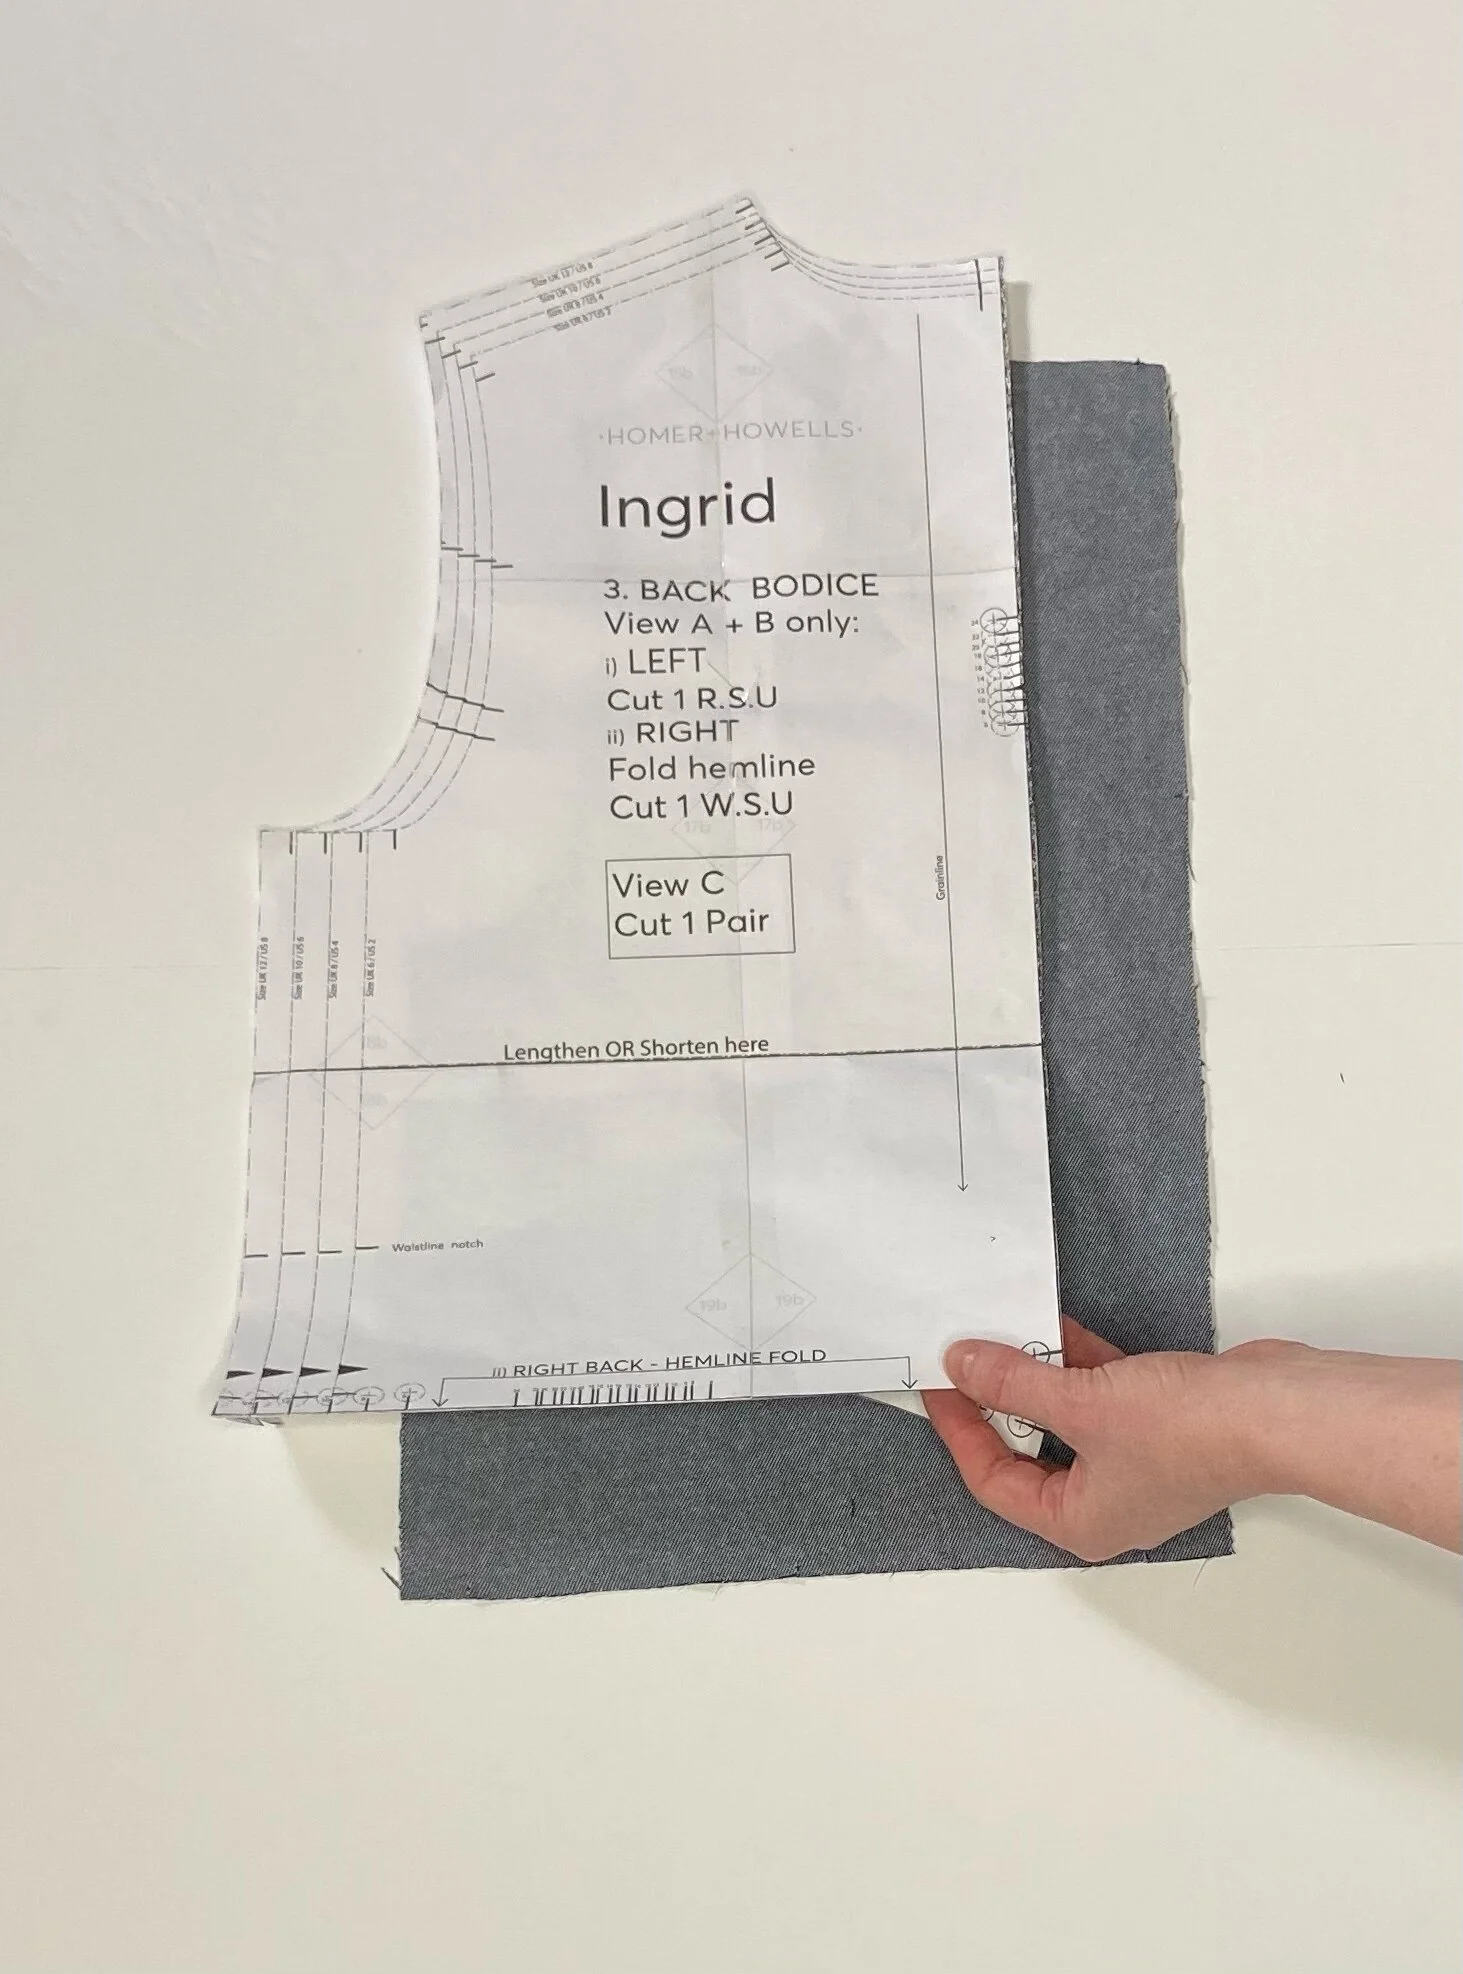
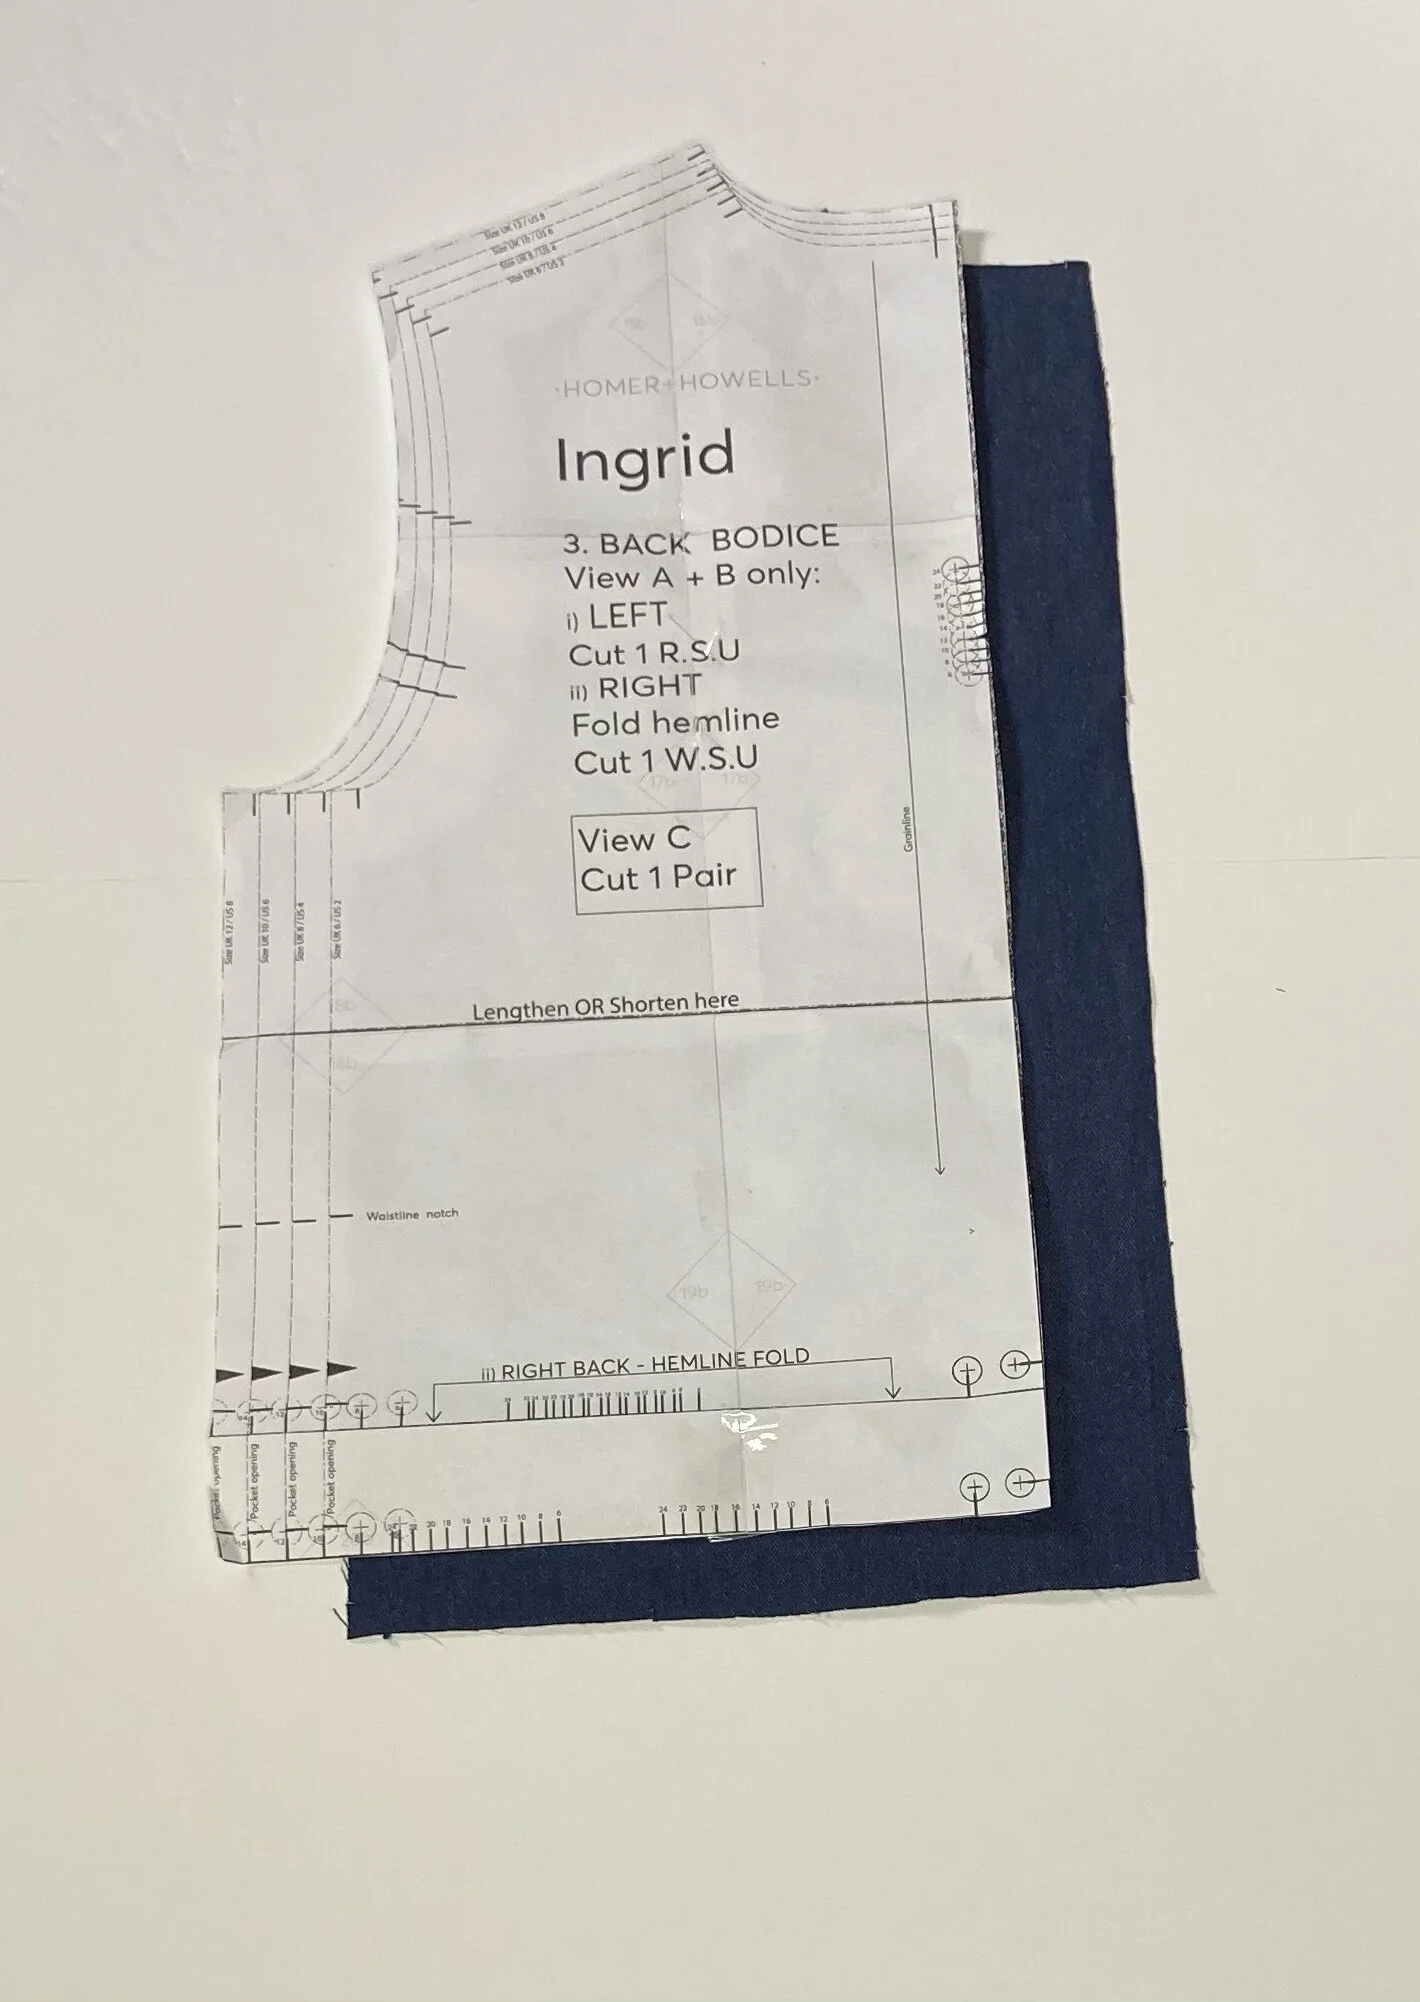
Then fold the pattern piece along the fold line, turn your fabric over to WSU (wrong side up) before cutting the second back bodice panel.
Label the back of each panel as soon as you have cut it. i.e. ‘Back Left’ for panel 3i) above and Back Right for 3ii)
Repeat the same process when cutting the right front and back panel from pattern piece 4.
Next, transfer all markings from the pattern pieces to your panels. Snip notches and mark drill hole’s with tailor’s tacks or chalk/fabric marker
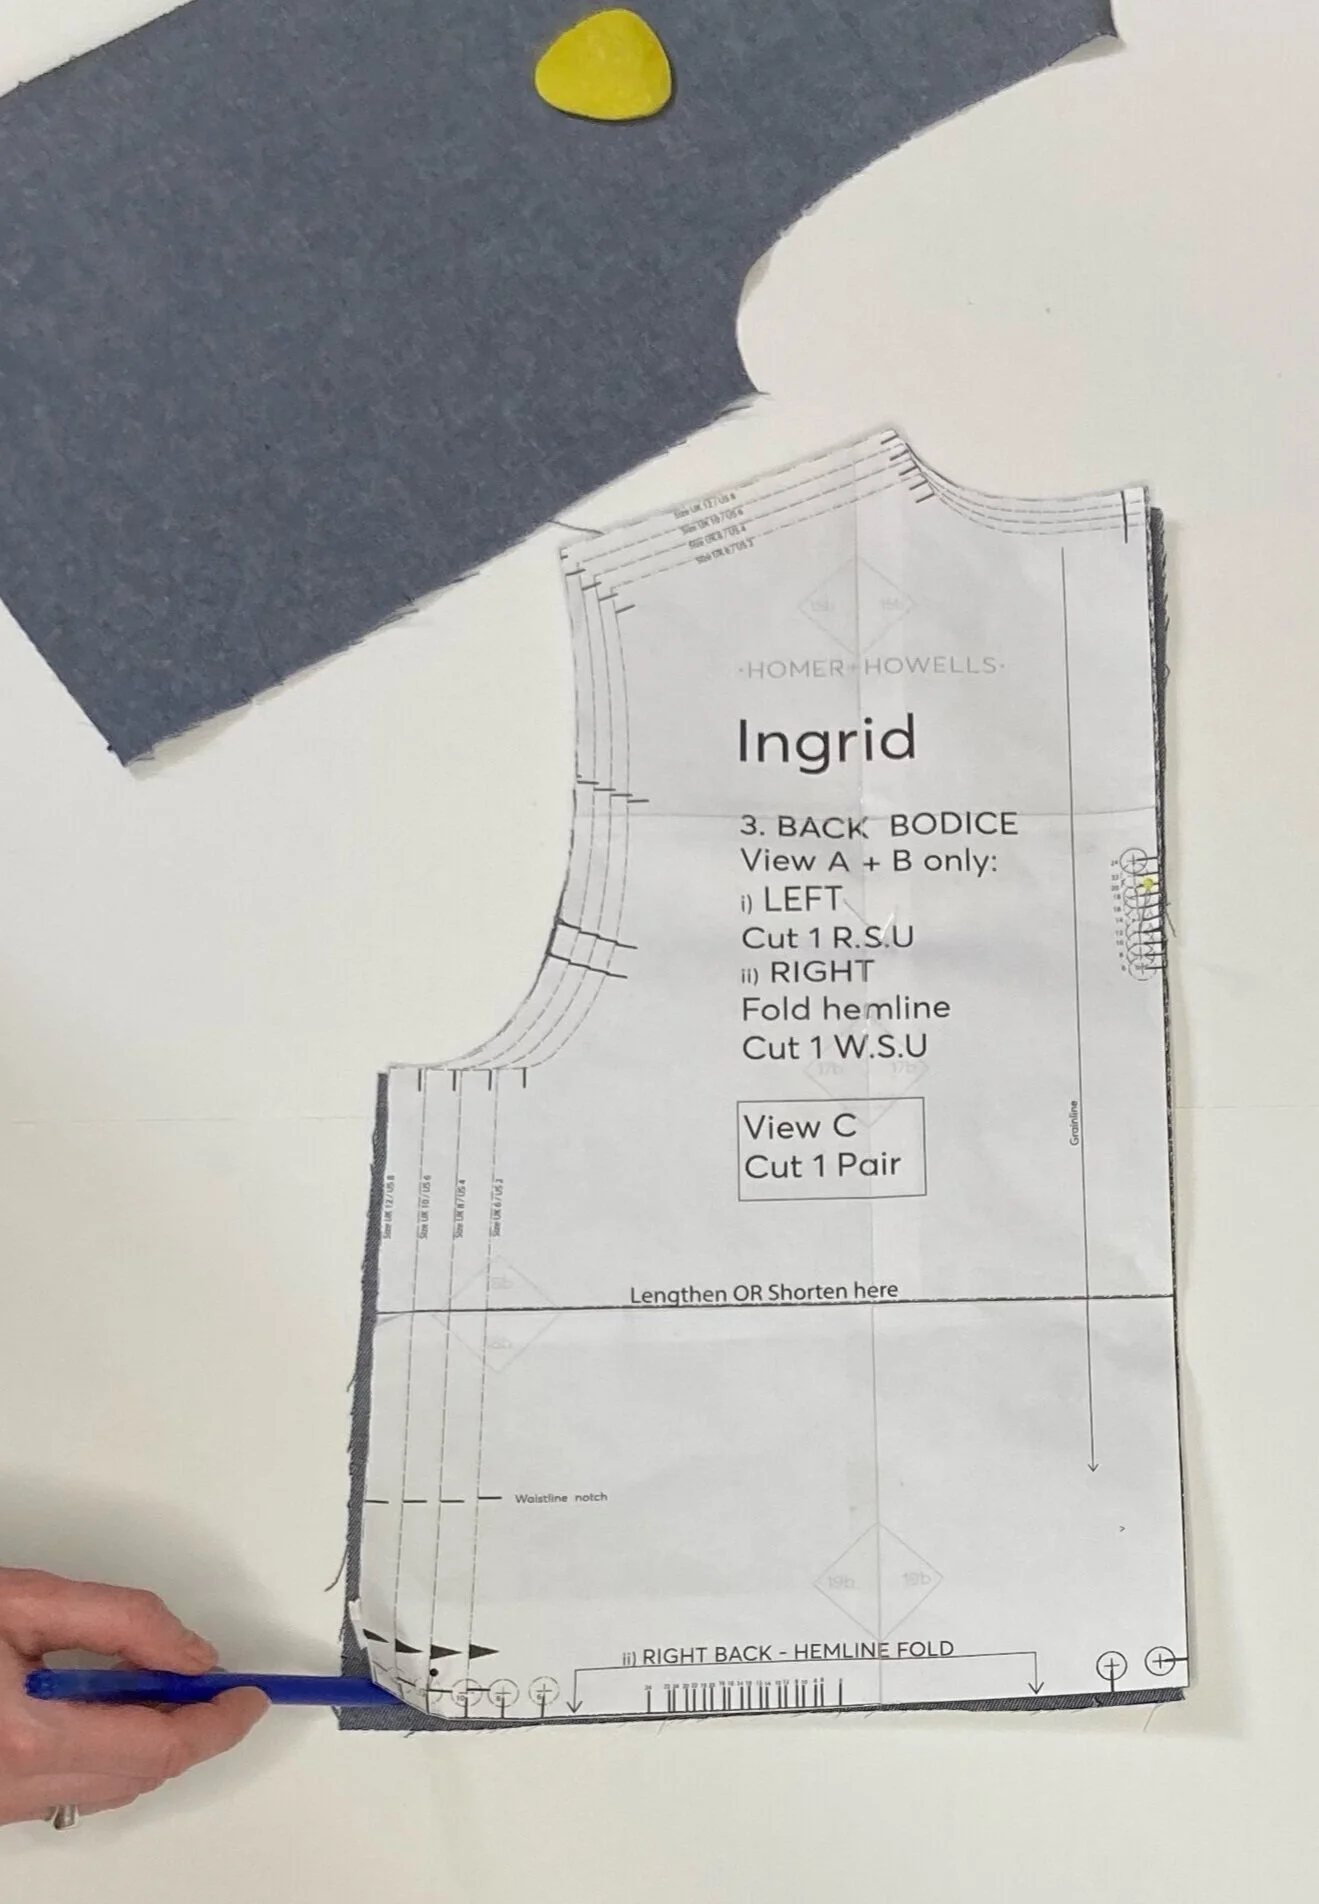
mark drill holes with a fabric marker or tailors tack
Label the back of each panel with chalk or fabric marker. (if you are using white or pale fabric, mark within your seam allowances)
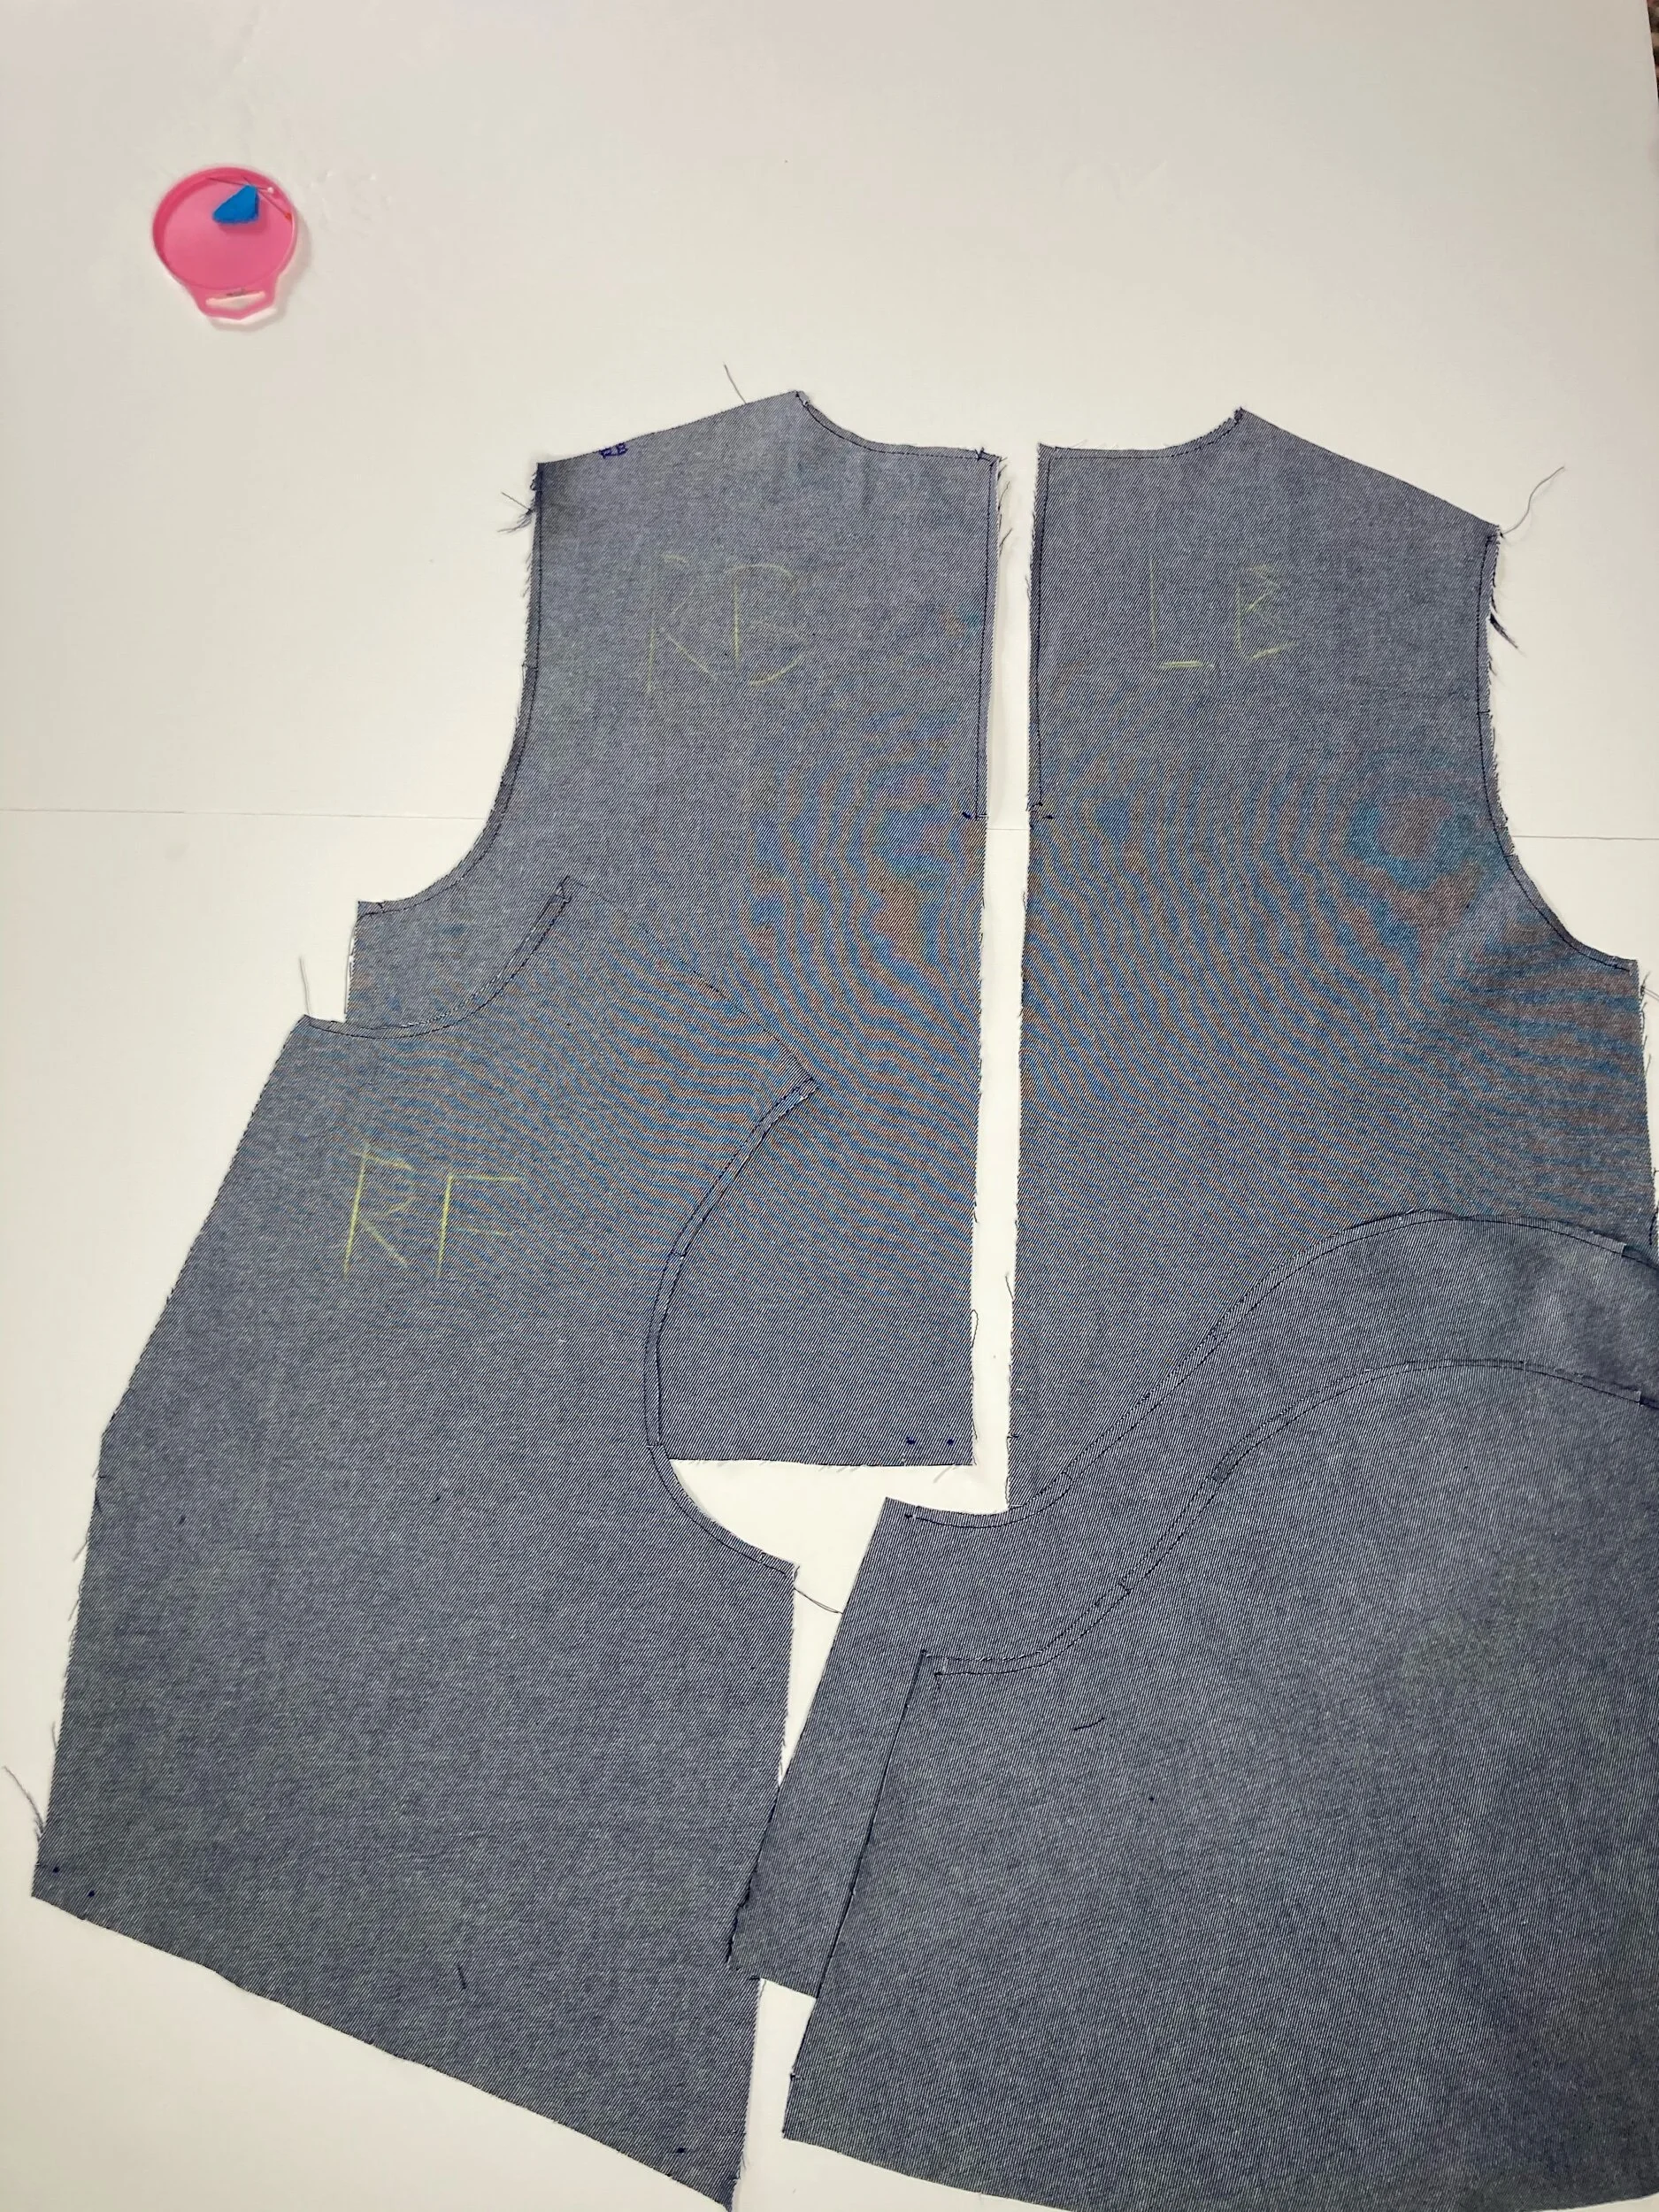
Then pair each skirt to its corresponding bodice and pin them together. Doing this will make matching panels after gathering much easier for you

Front Right bodice and Skirt panels labelled and paired
Next, block fuse enough cloth to cut the neck facings from. This means you fuse iron-on interfacing to your fabric before cutting the panels
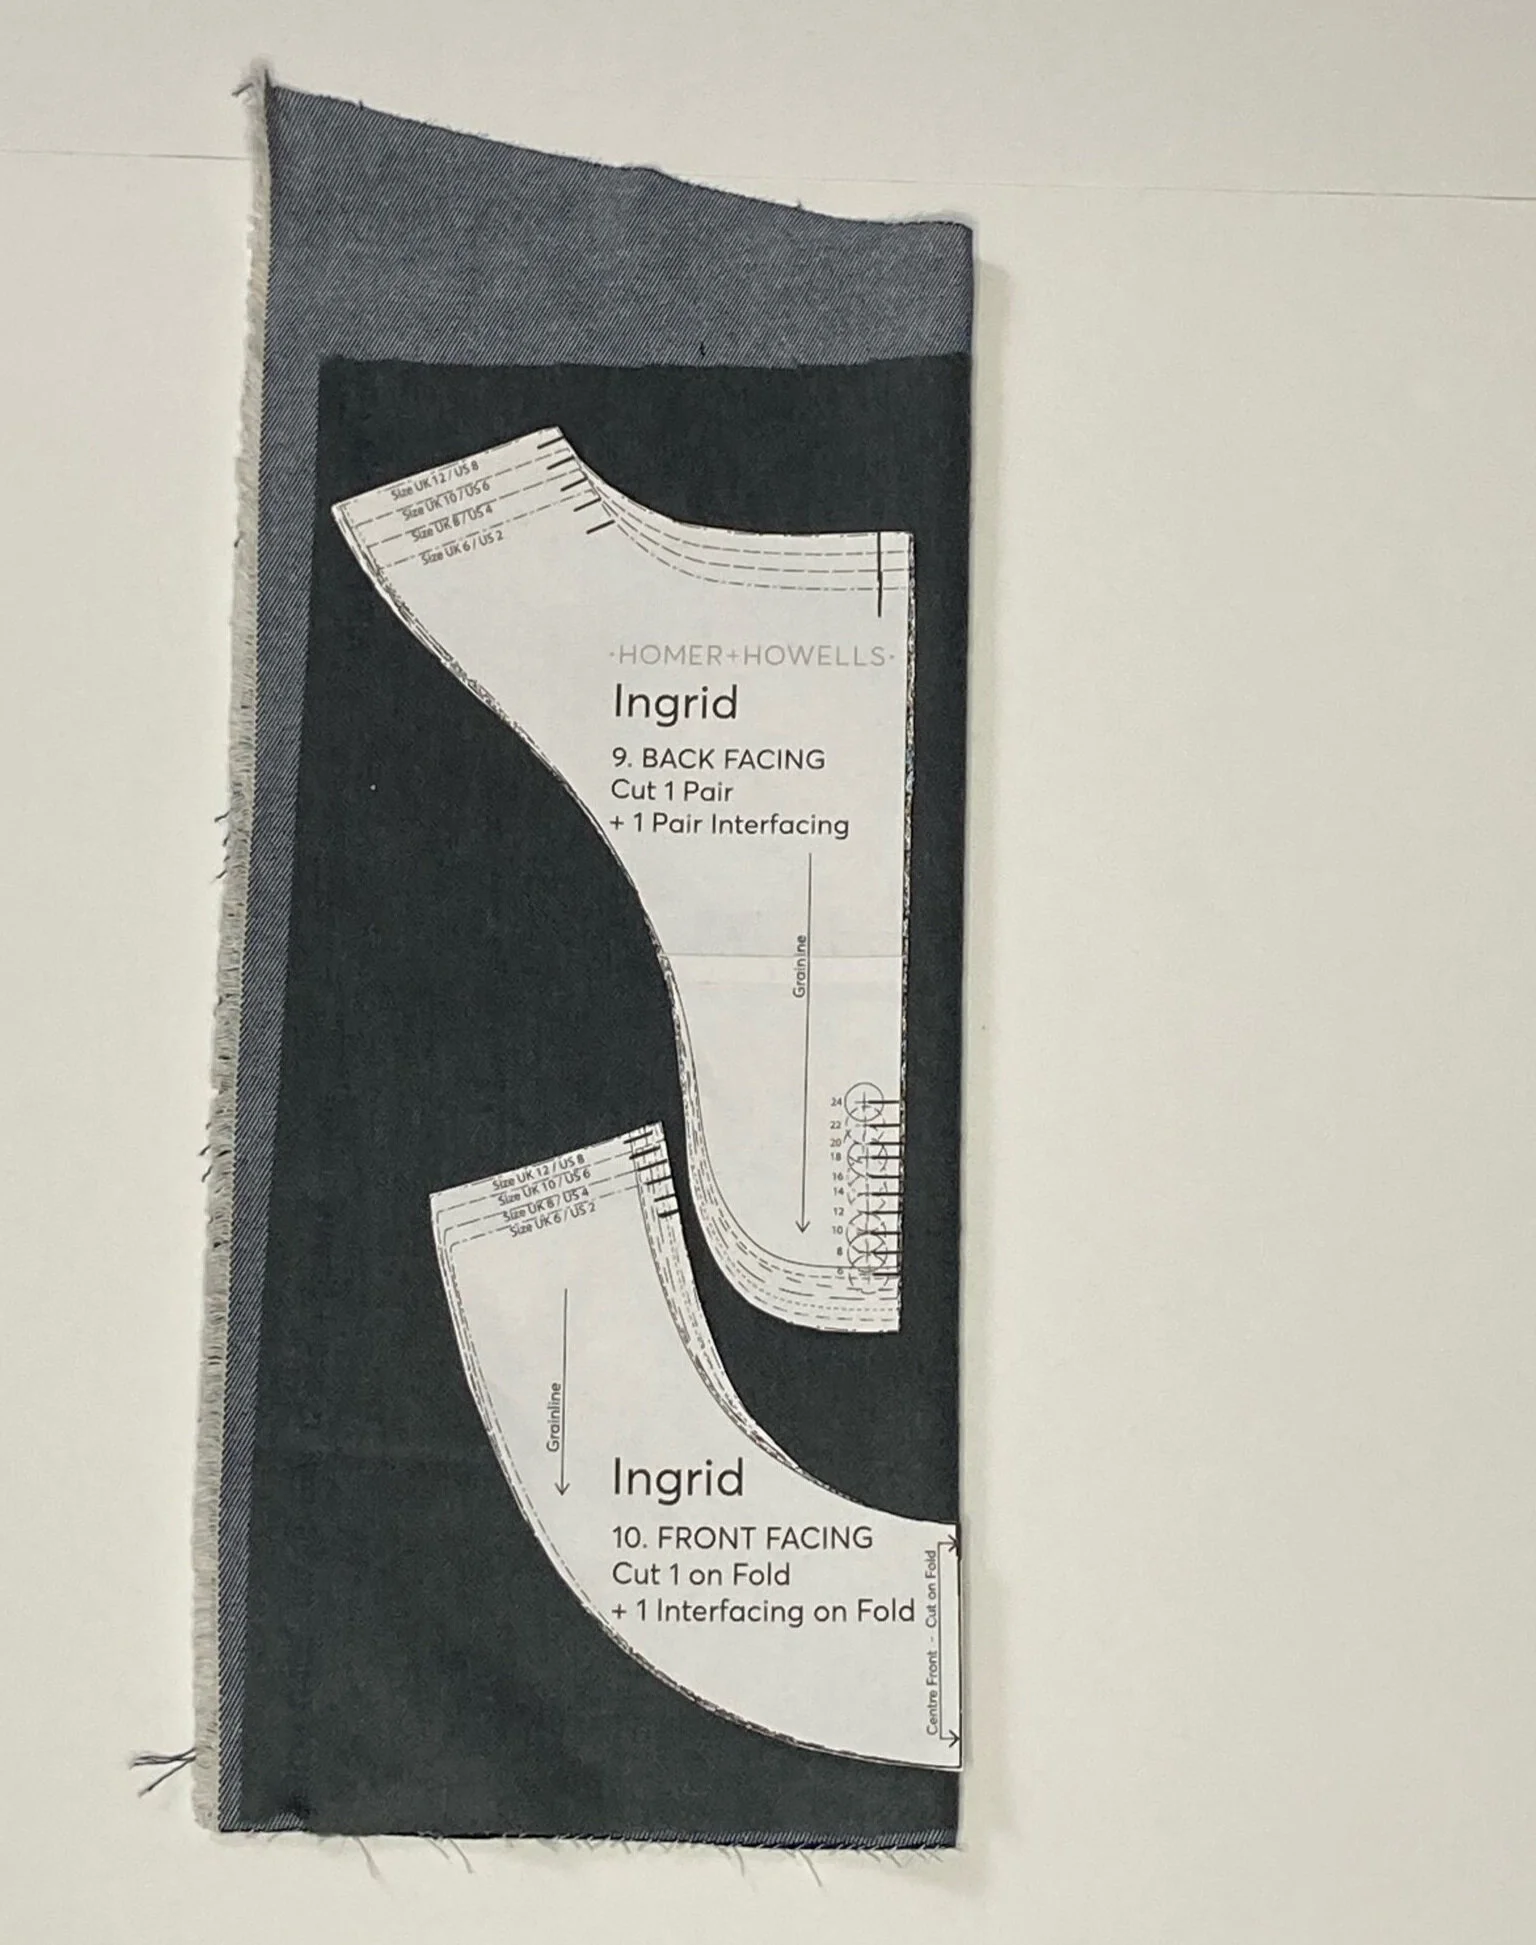
Block fuse enough fabric to cut the neck facings
Preparing Your Panels For Sewing
5mm (3/16”) from the seam edge, stay stitch neck edges, armholes sleeve head, and centre-back down to keyhole drill
Stay-stiched bodices and sleeves
Lay your front bodice panels down, with the right side facing up. Match the pleat notches on the centre front edge, to create the tuck
Right sides together, fold the tuck up, towards the neck and pin into place

match notches on the centre-front edge
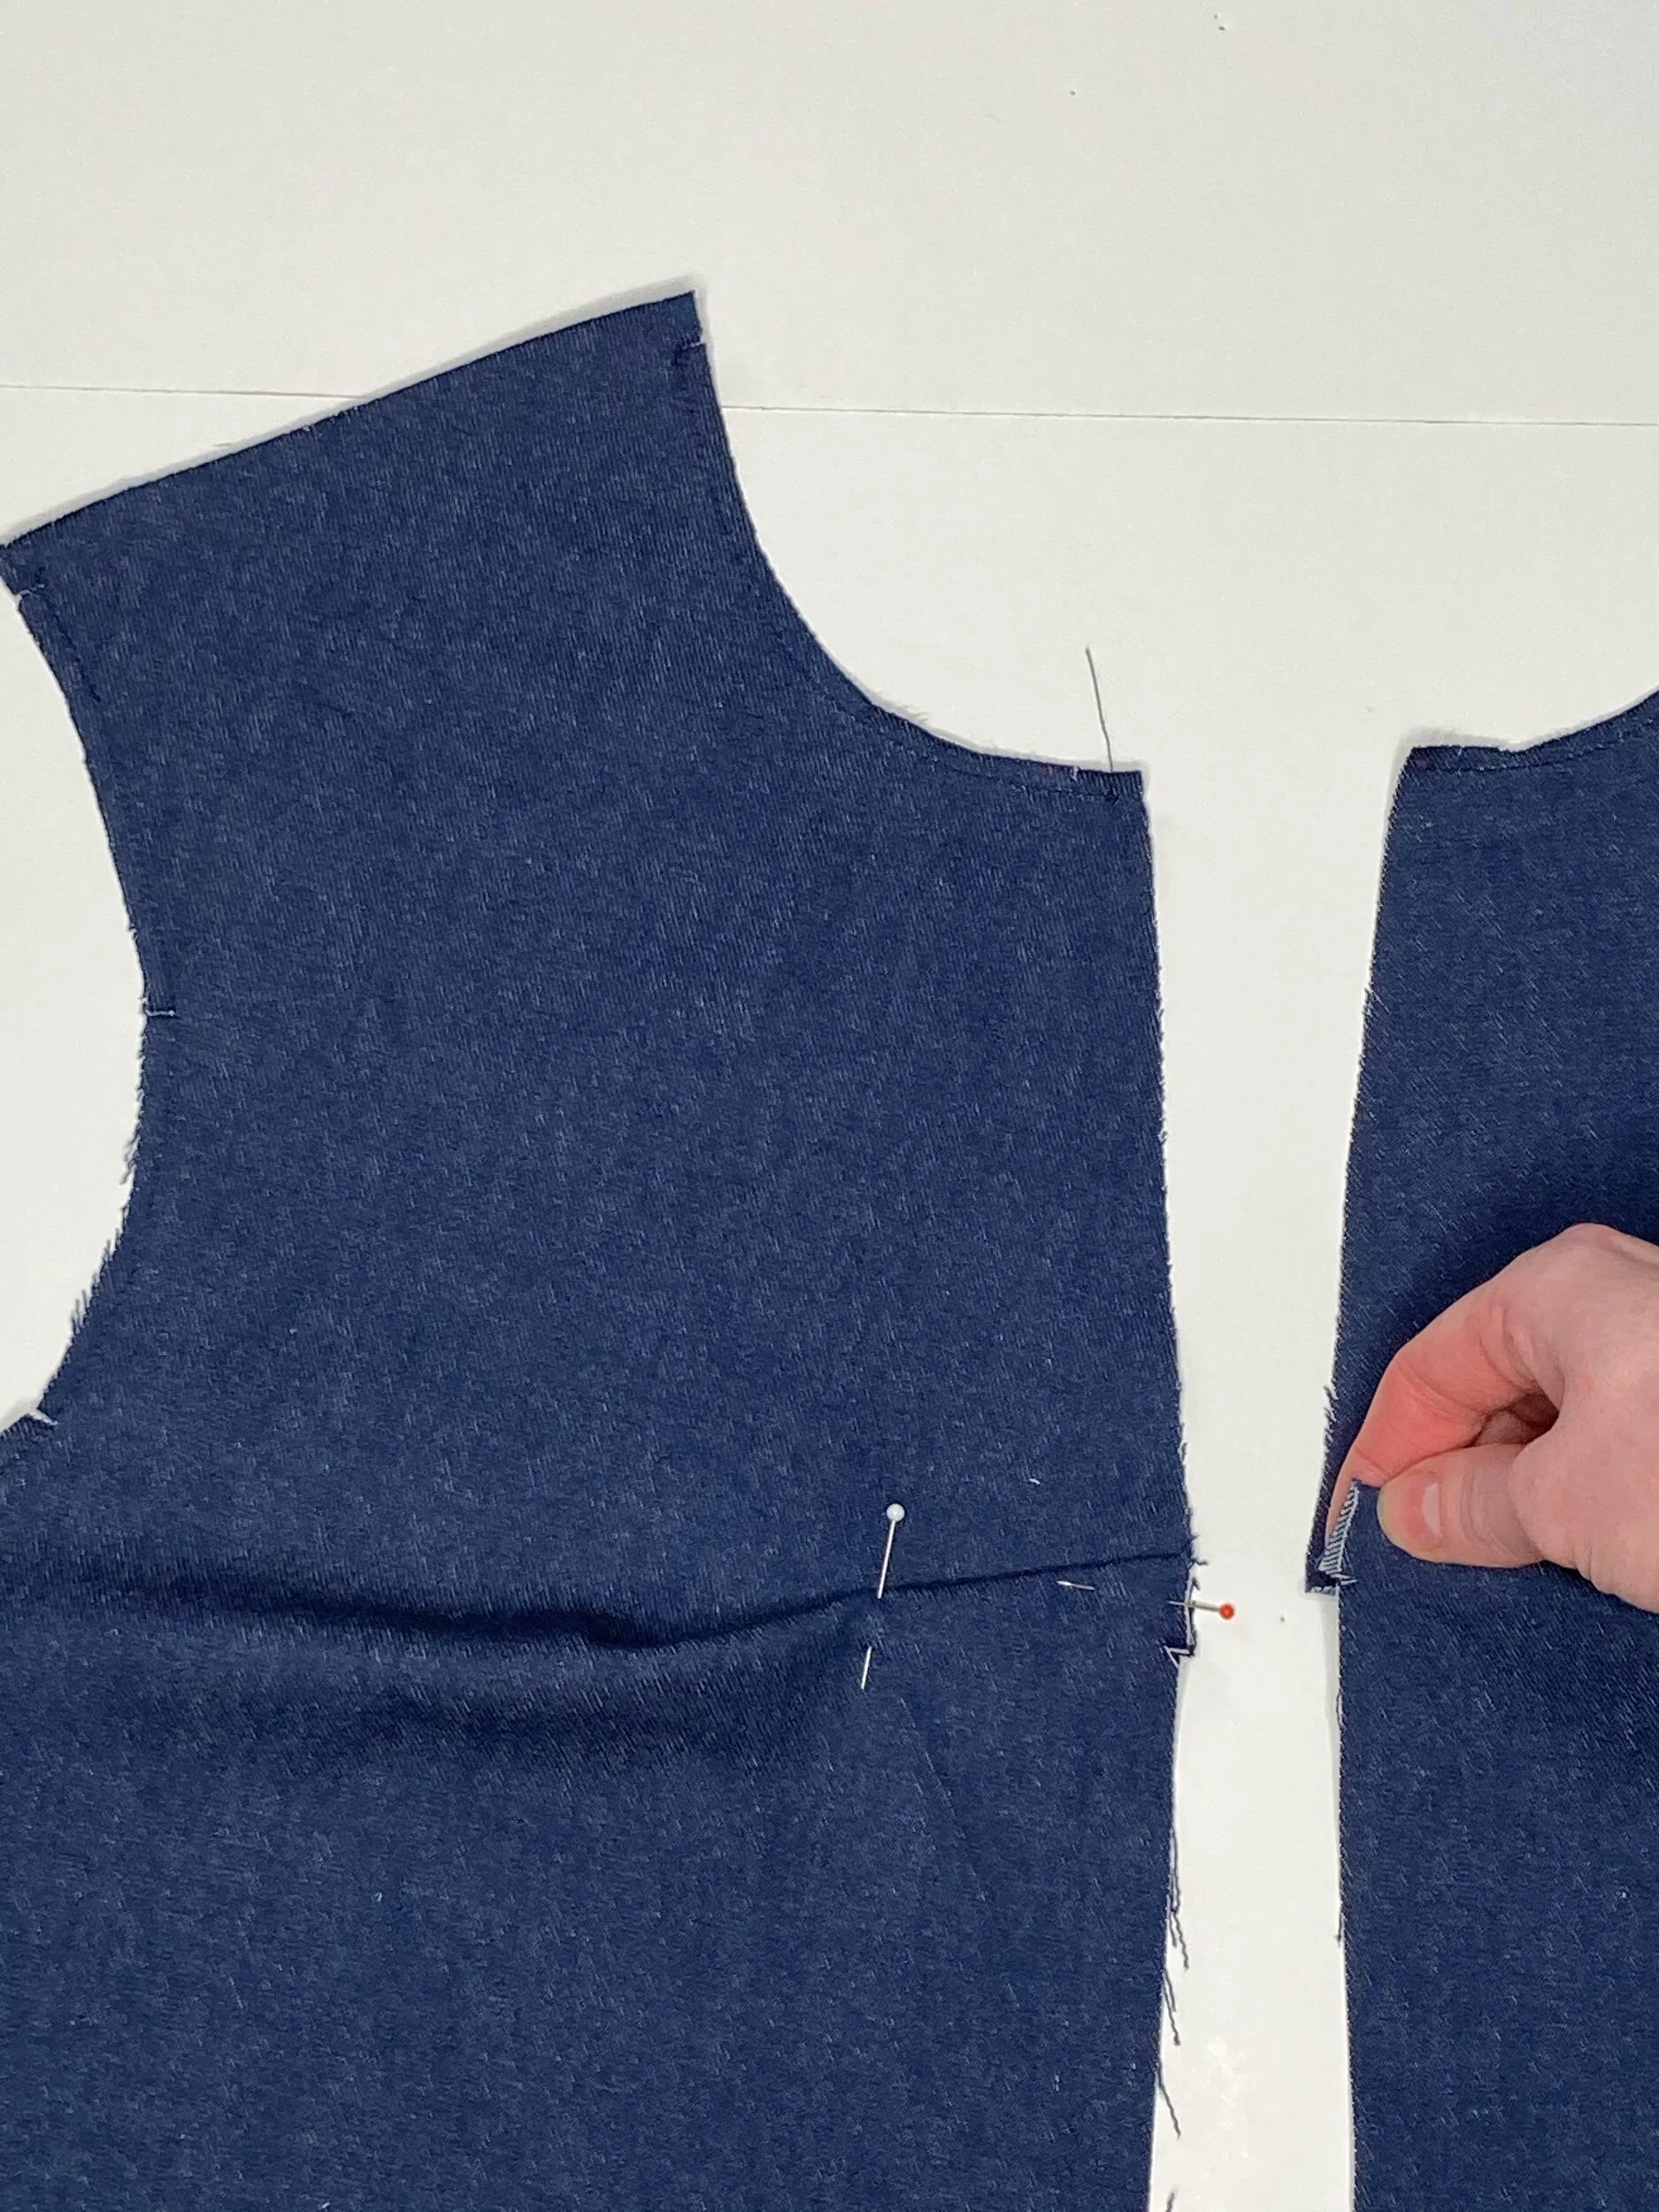
Once matched fold the tuck up, towards the neck and pin
Secure the tucks in place. 5mm (3/16”) from the panel edge, sew the pleat down

Stitched down tucks, shown here with Right side up
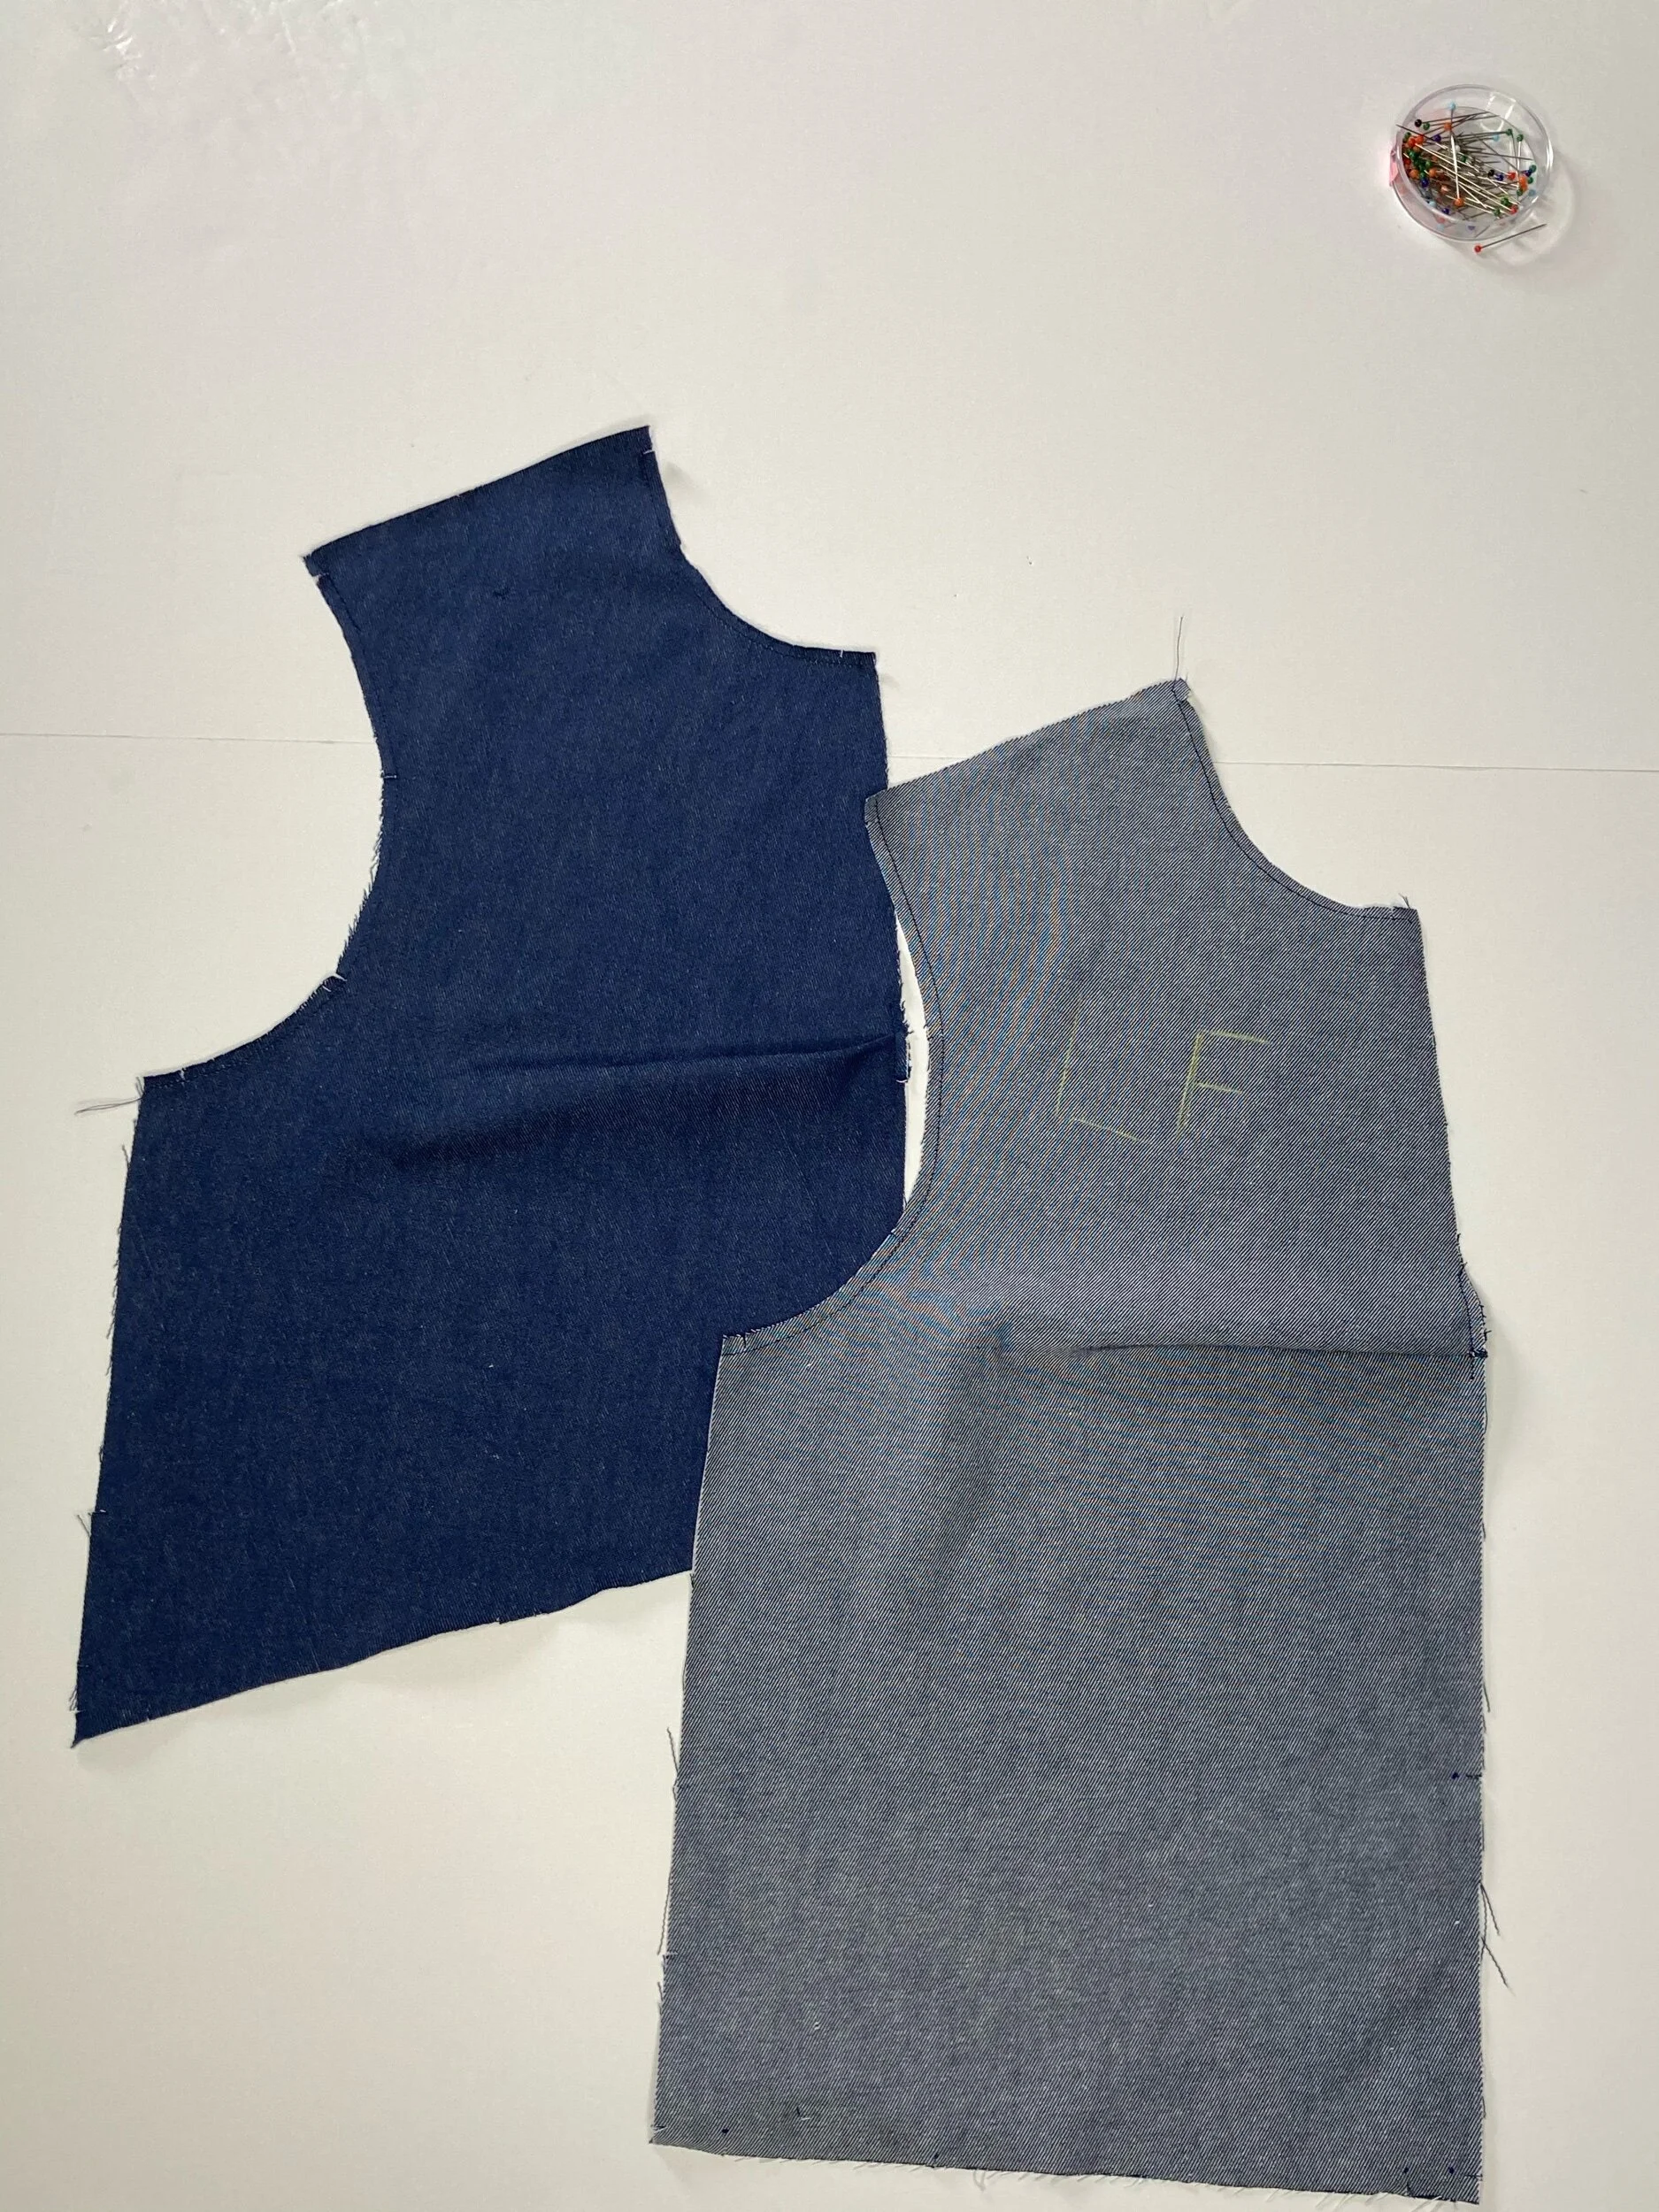
*Note. The tuck will be folded up on the right side and down on the inside as shown here
Overlock or zig-zag shoulders, centre-back bodice (from the keyhole drill point to the hem), all other vertical edges, outer edges of facings, facing shoulder, centre-back from the drill to the hem
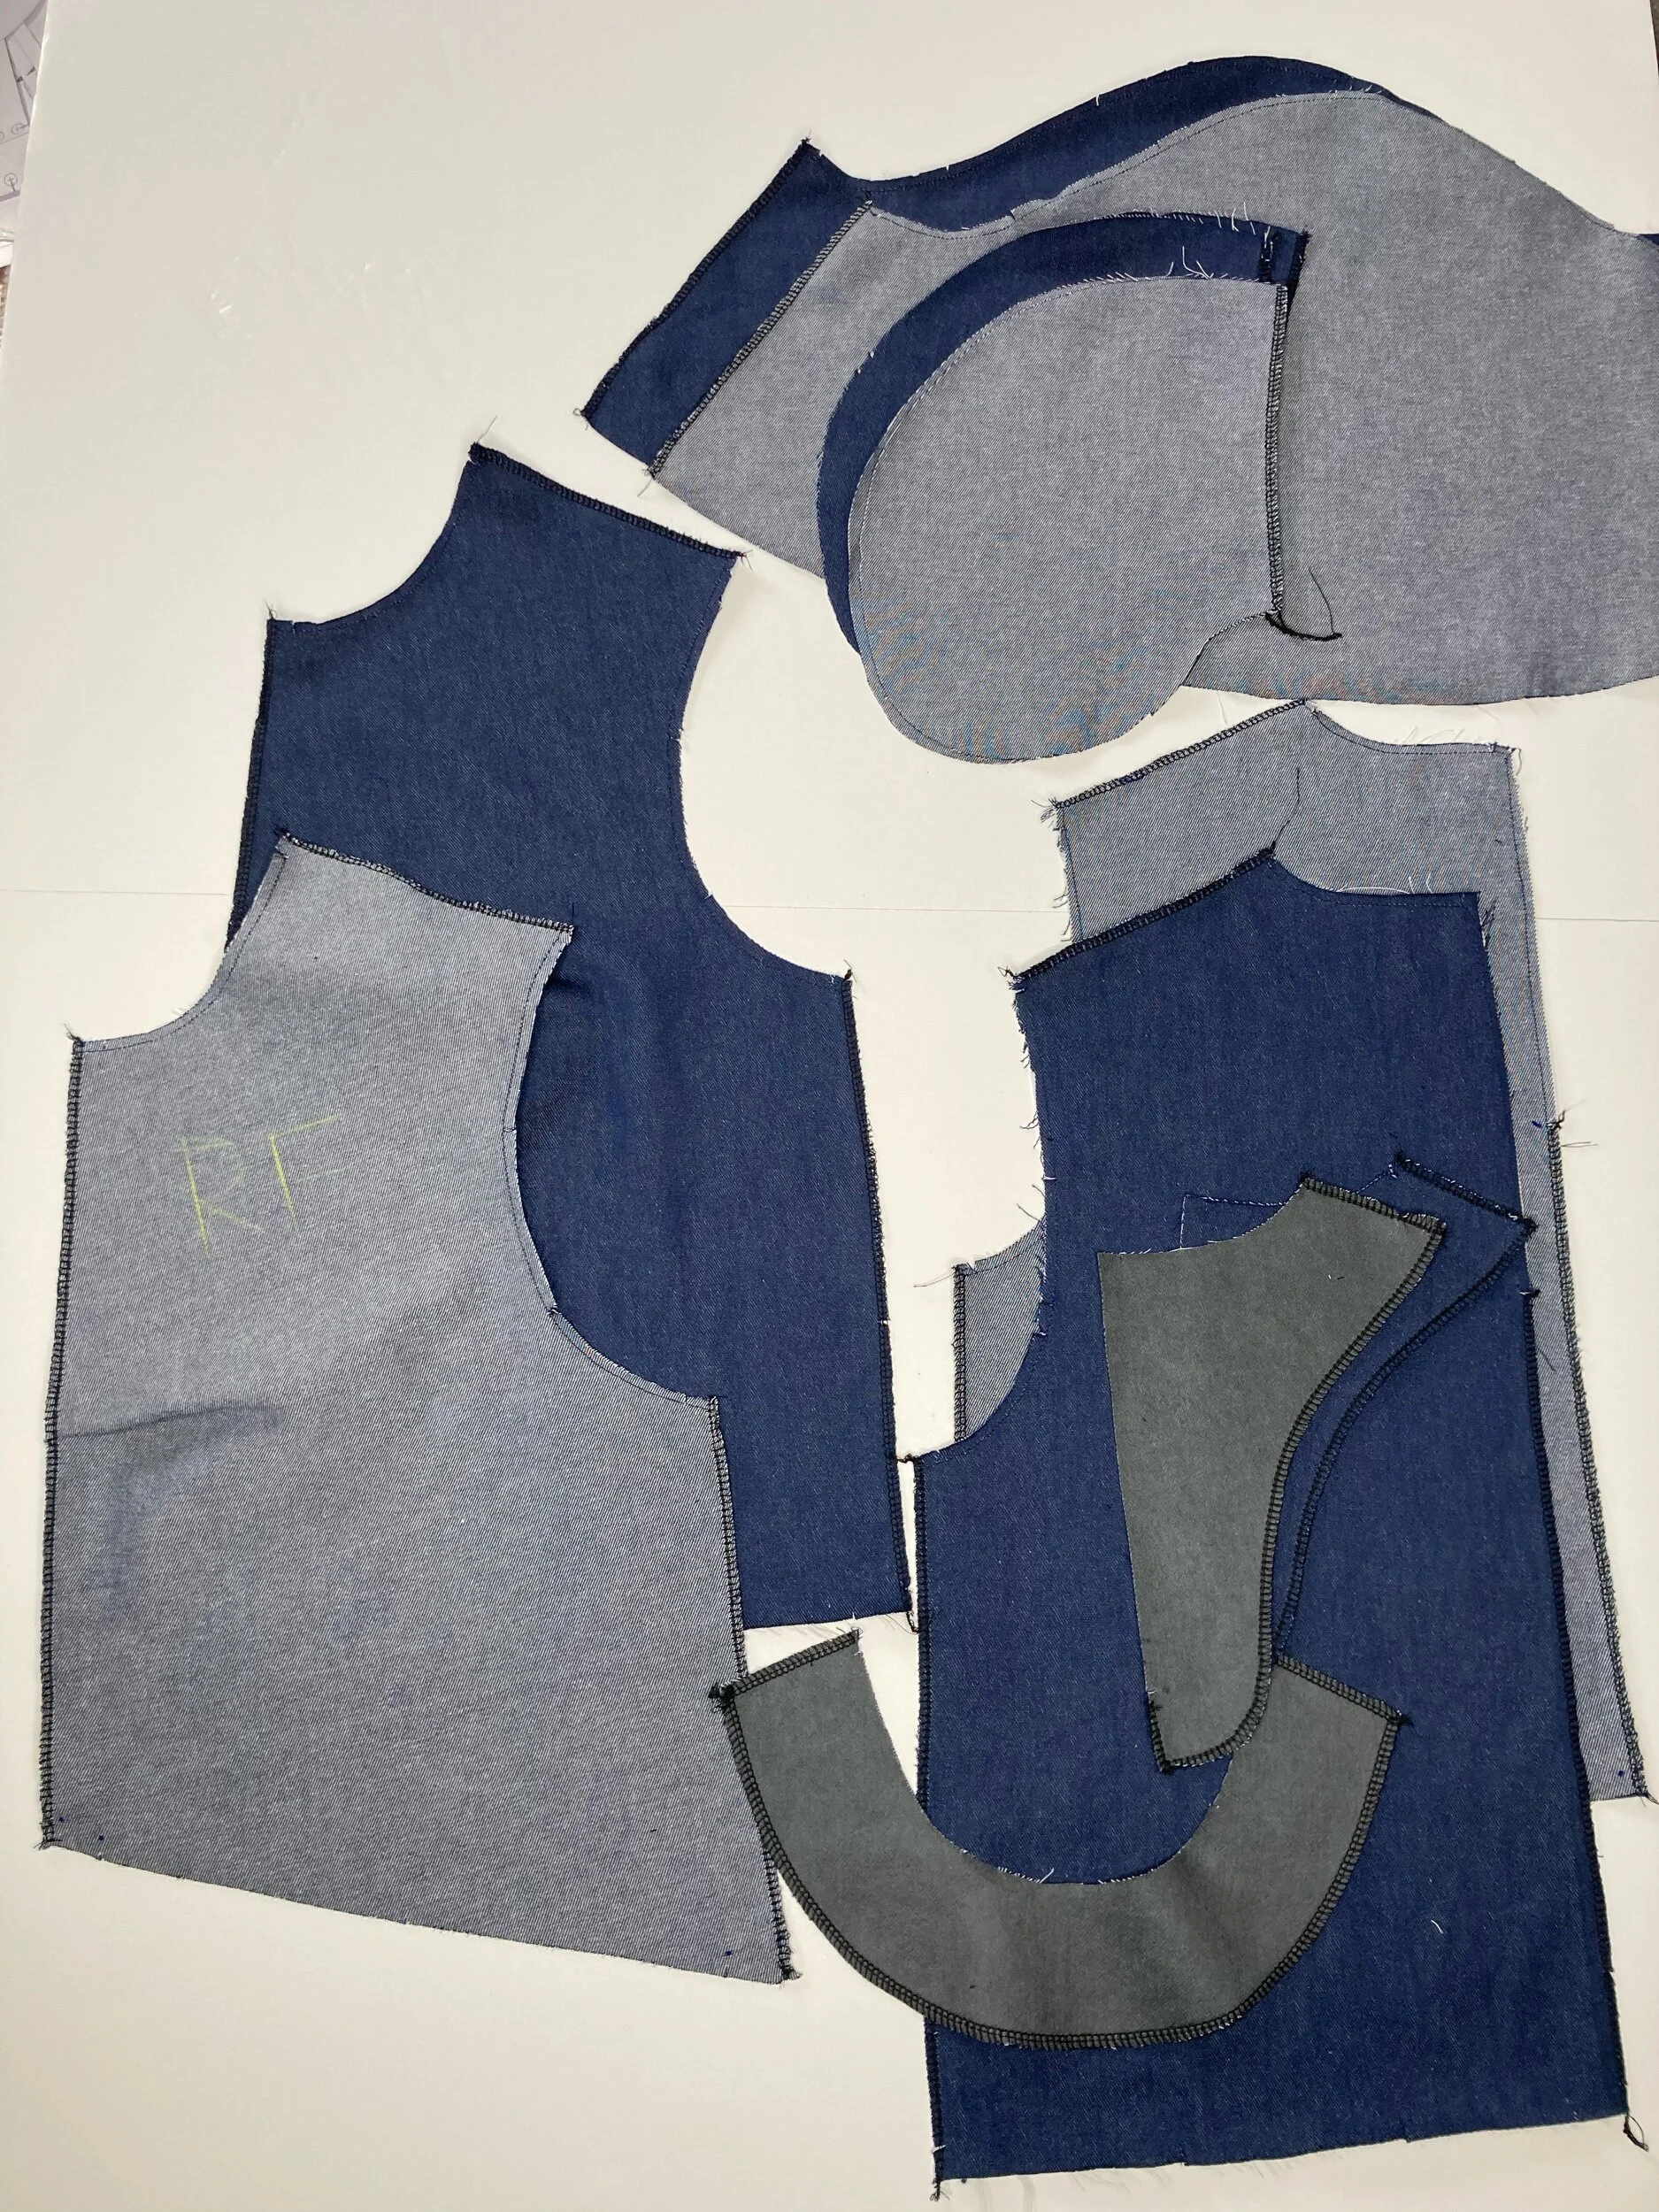
Overlock edges as above (make sure to overlock the vertical edges of your skirt panels too)
Take care to catch the pleat of the bust tuck into the overlocked edge.
*When prepping your panels, take extra care with the front bodices. As the top section of the bodice is cut off grain it could stretch out if overhandled
For views A and B, make sure to pair and pin your bodice and skirts together after overlocking
That’s everything for today - tomorrow we will start assembling, see you then x