How To Do A Narrow Or Broad Shoulder Adjustment

We often design our sewing patterns with a wide and slightly dropped shoulder. This gives an easy, relaxed fit and often an androgynous look to our styles. Getting the shoulder position just right is key for fit and as it’s a quick adjustment its easy to slot into your process. If you find that your shoulders are often too wide or a little tight, read on for a straight forward method to amend the shoulder position. This method will work for any sewing pattern with a standard set-in sleeve.
Measurements
You may have the same measurement’s as the person next to you, so in theory, the same size clothes should fit right?
Nope. Not always the case. One has rounder breasts and a narrow back, the other has broader shoulders and small breasts. Or, one has narrow hips and a round bottom while the other wider hips and a flat bottom. If you’re going to take the time to make your own clothes. It’s so worth taking the extra time to make sure they fit properly before you cut into your cloth.
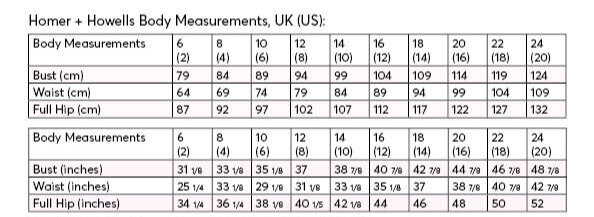
Where to Start
First things first. In our instructions, you will find 2 measurement charts. One with body measurements and one with the finished pattern/garment measurements. Follow the body measurement chart to your closest measurements and cut your pattern.
Team Toile Always
It’s at this stage we would always make a toile. You can see how the garment is falling on your body and what adjustments (if any) you need to make.
If the shoulder seam is dropping too far over your shoulder mark with a pin where you would like the shoulder point to end. Measure the distance between the current shoulder point and where your pin ends. This is the measurement you will be taking away from your pattern.
Alternatively, if you feel like you need some extra width into the shoulder mark with a pin on the sleeve head where you would like the shoulder point to end. Again, measure the distance between the shoulder point and the pin.
If you really don’t want to make a toile then do to a quick check where the pattern is going to sit on your body hold the cut-out paper pattern up onto your body. You should get a good idea of where the shoulder will fall.
Shoulder Points
Our first capsule collection has 3 designs with sleeves. The Lennox Boiler suit, Cissy Dress and Blair Blazer. All 3 are designed with a slightly dropped shoulder. It’s worth noting this for any amendments you make.
Below you’ll find a simple step by step instruction on how to alter your shoulder points.
You will need.
Your pattern
paper
sticky tape
a pencil

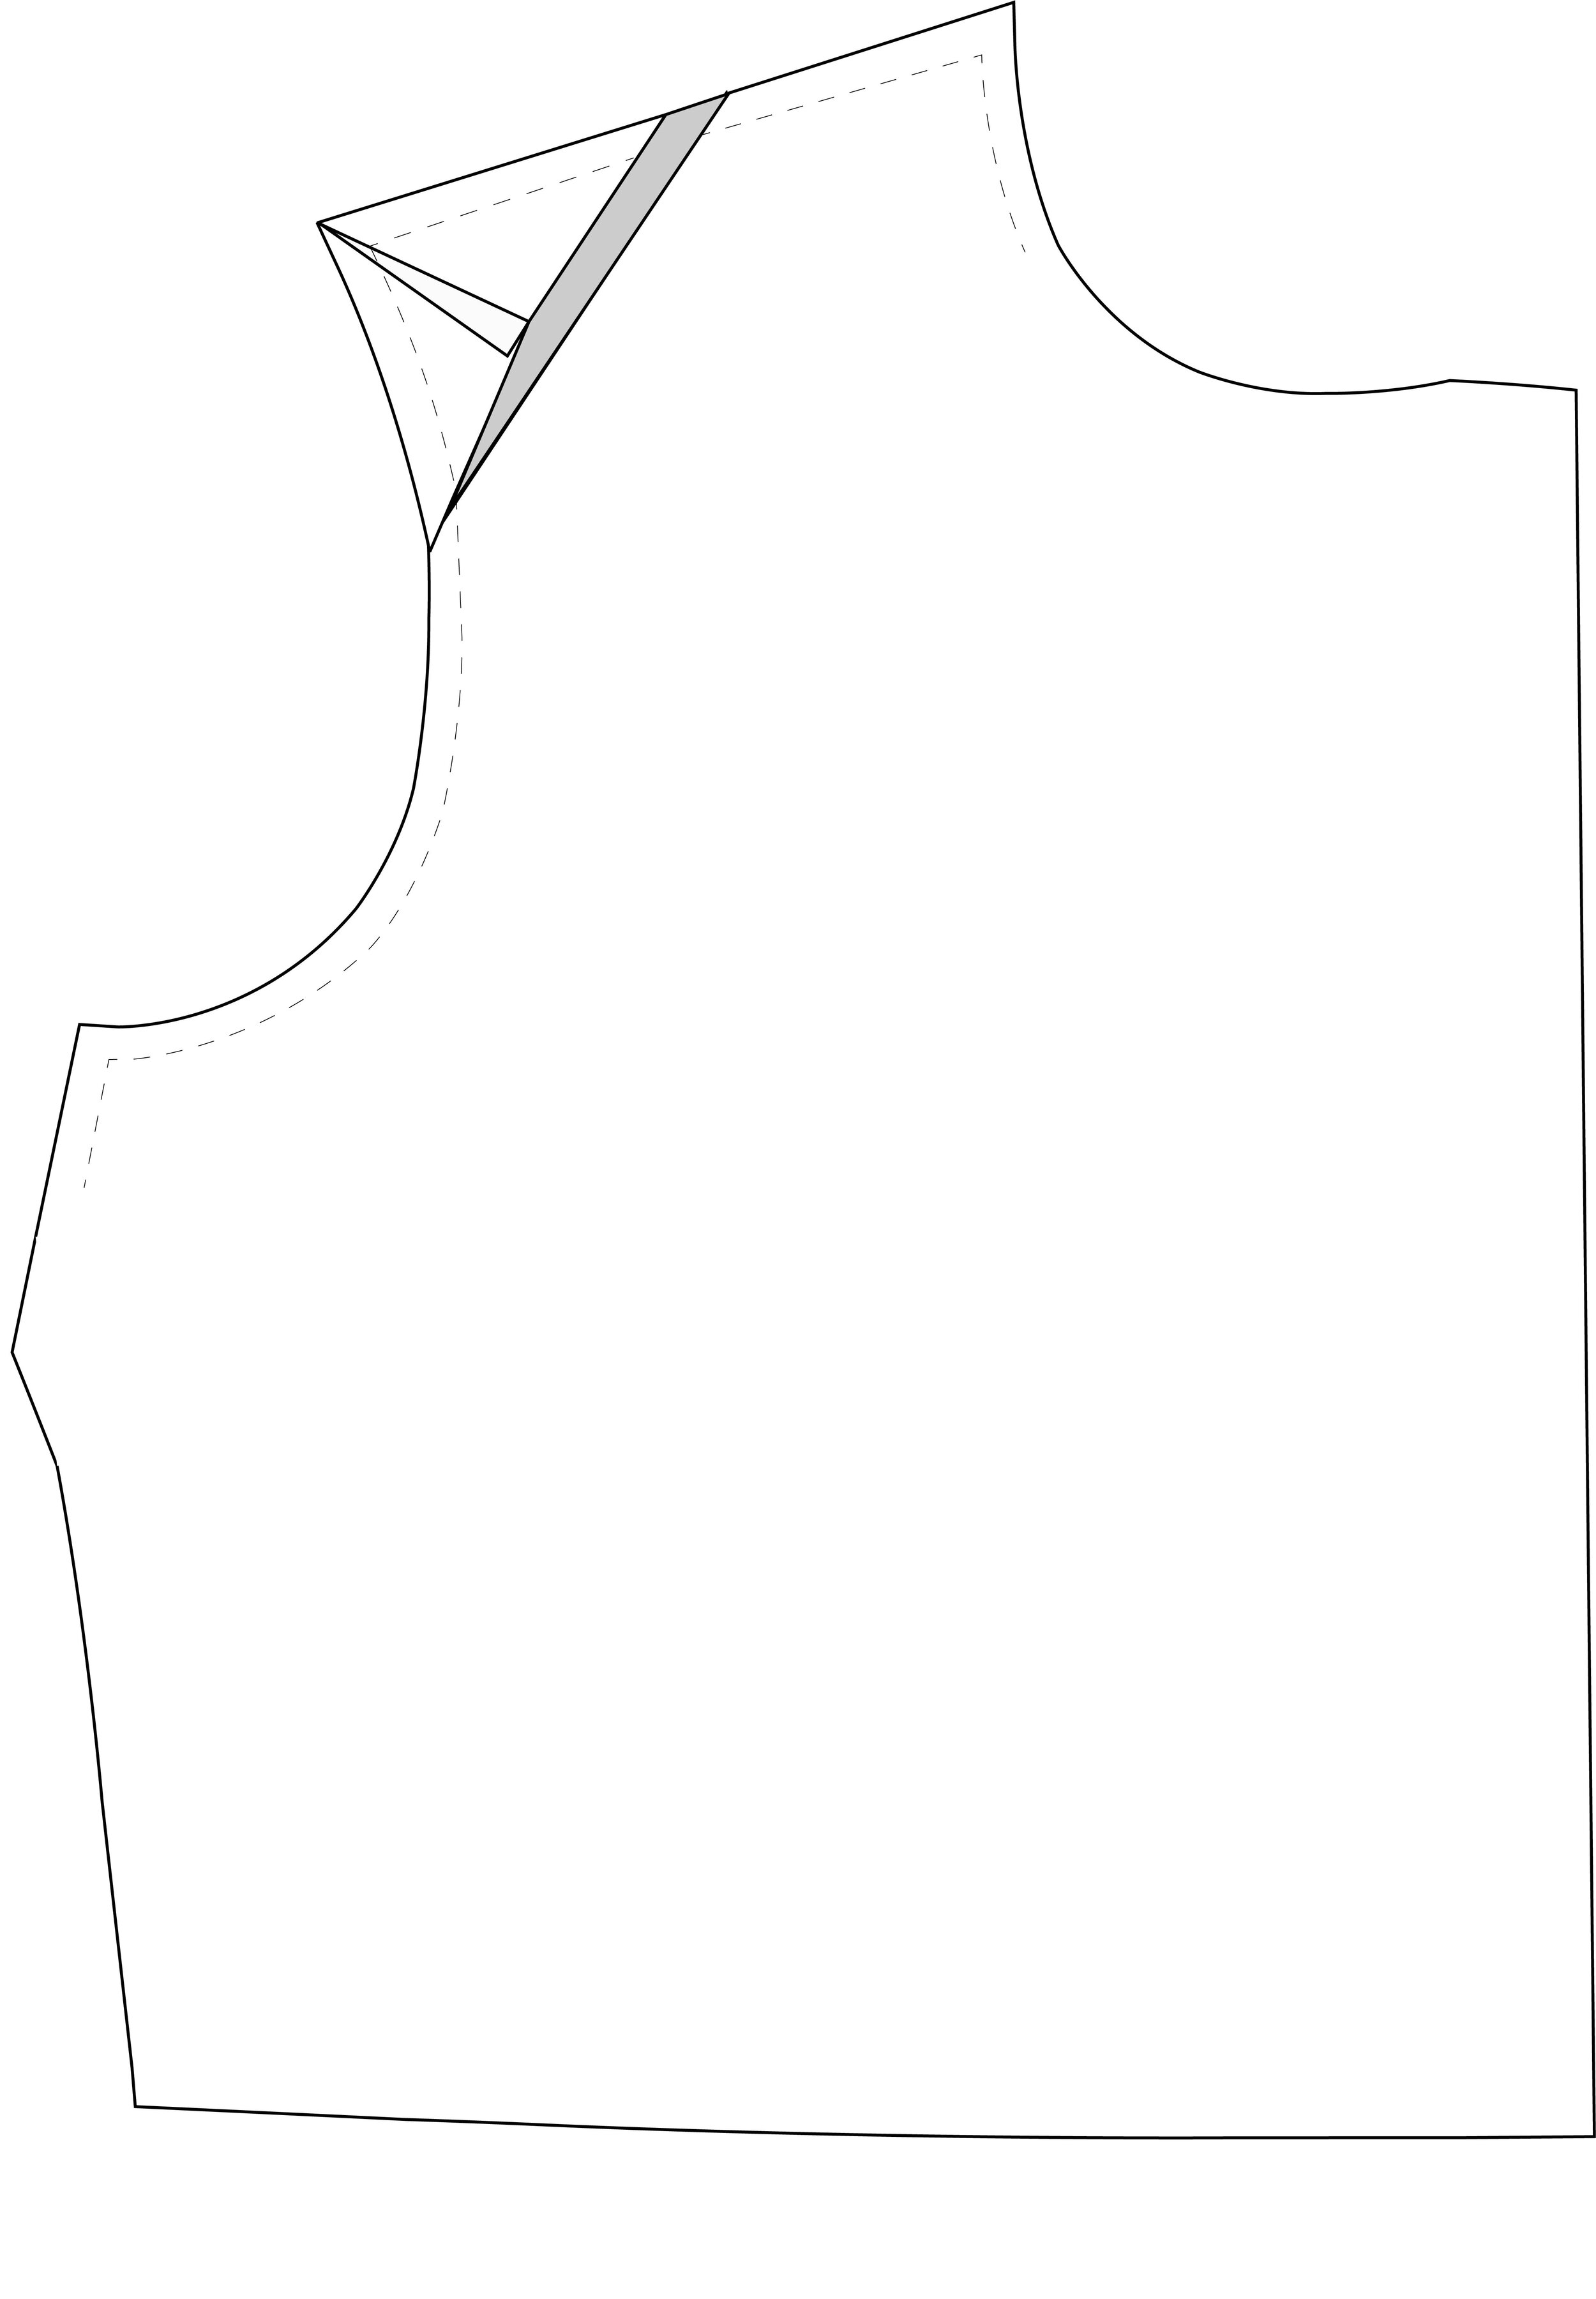
1. Draw in your 1cm seam allowance on the shoulder and armhole

2. Draw a vertical line from he middle of the shoulder seam and a horizontal line one third down the armhole

3. Draw a long from the armhole to the shoulder. Ensure you cross the points where the blue lines pictured meet the seam allowances

4. Draw a line at right angles from this into the shoulder point

5. Cut off the 2 pieces from your shoulder

6. You will have 3 pieces
a. Bodice
b. Shoulder
c. Armhole
Broad Shoulder

1. Stick a piece of paper behind the bodice. Draw a new line along the shoulder extending it past the armhole

2. . From your toile measure how much you want to extend your shoulder.. Place the shoulder cut out on the new shoulder line and slide it over by the amount you are extending the shoulder by. Stick into place

3. Matching the seam allowance lines place the armhole cut out into postion. The seam allowance will be edge to edge on the shoulder point and where the armhole joins the bodice. The pattern pieces will overlap slightly as the sketch. Tape into place

4. Draw in a new armhole curve
5. Cut out your new front bodice

6. Repeat on the back bodice. It is really important to increase the front and back bodice by the same amount to ensure your shoulder seams match
Narrow Shoulder

1. Stick a piece of paper behind the bodice. Draw a new line along the shoulder extending it past the armhole
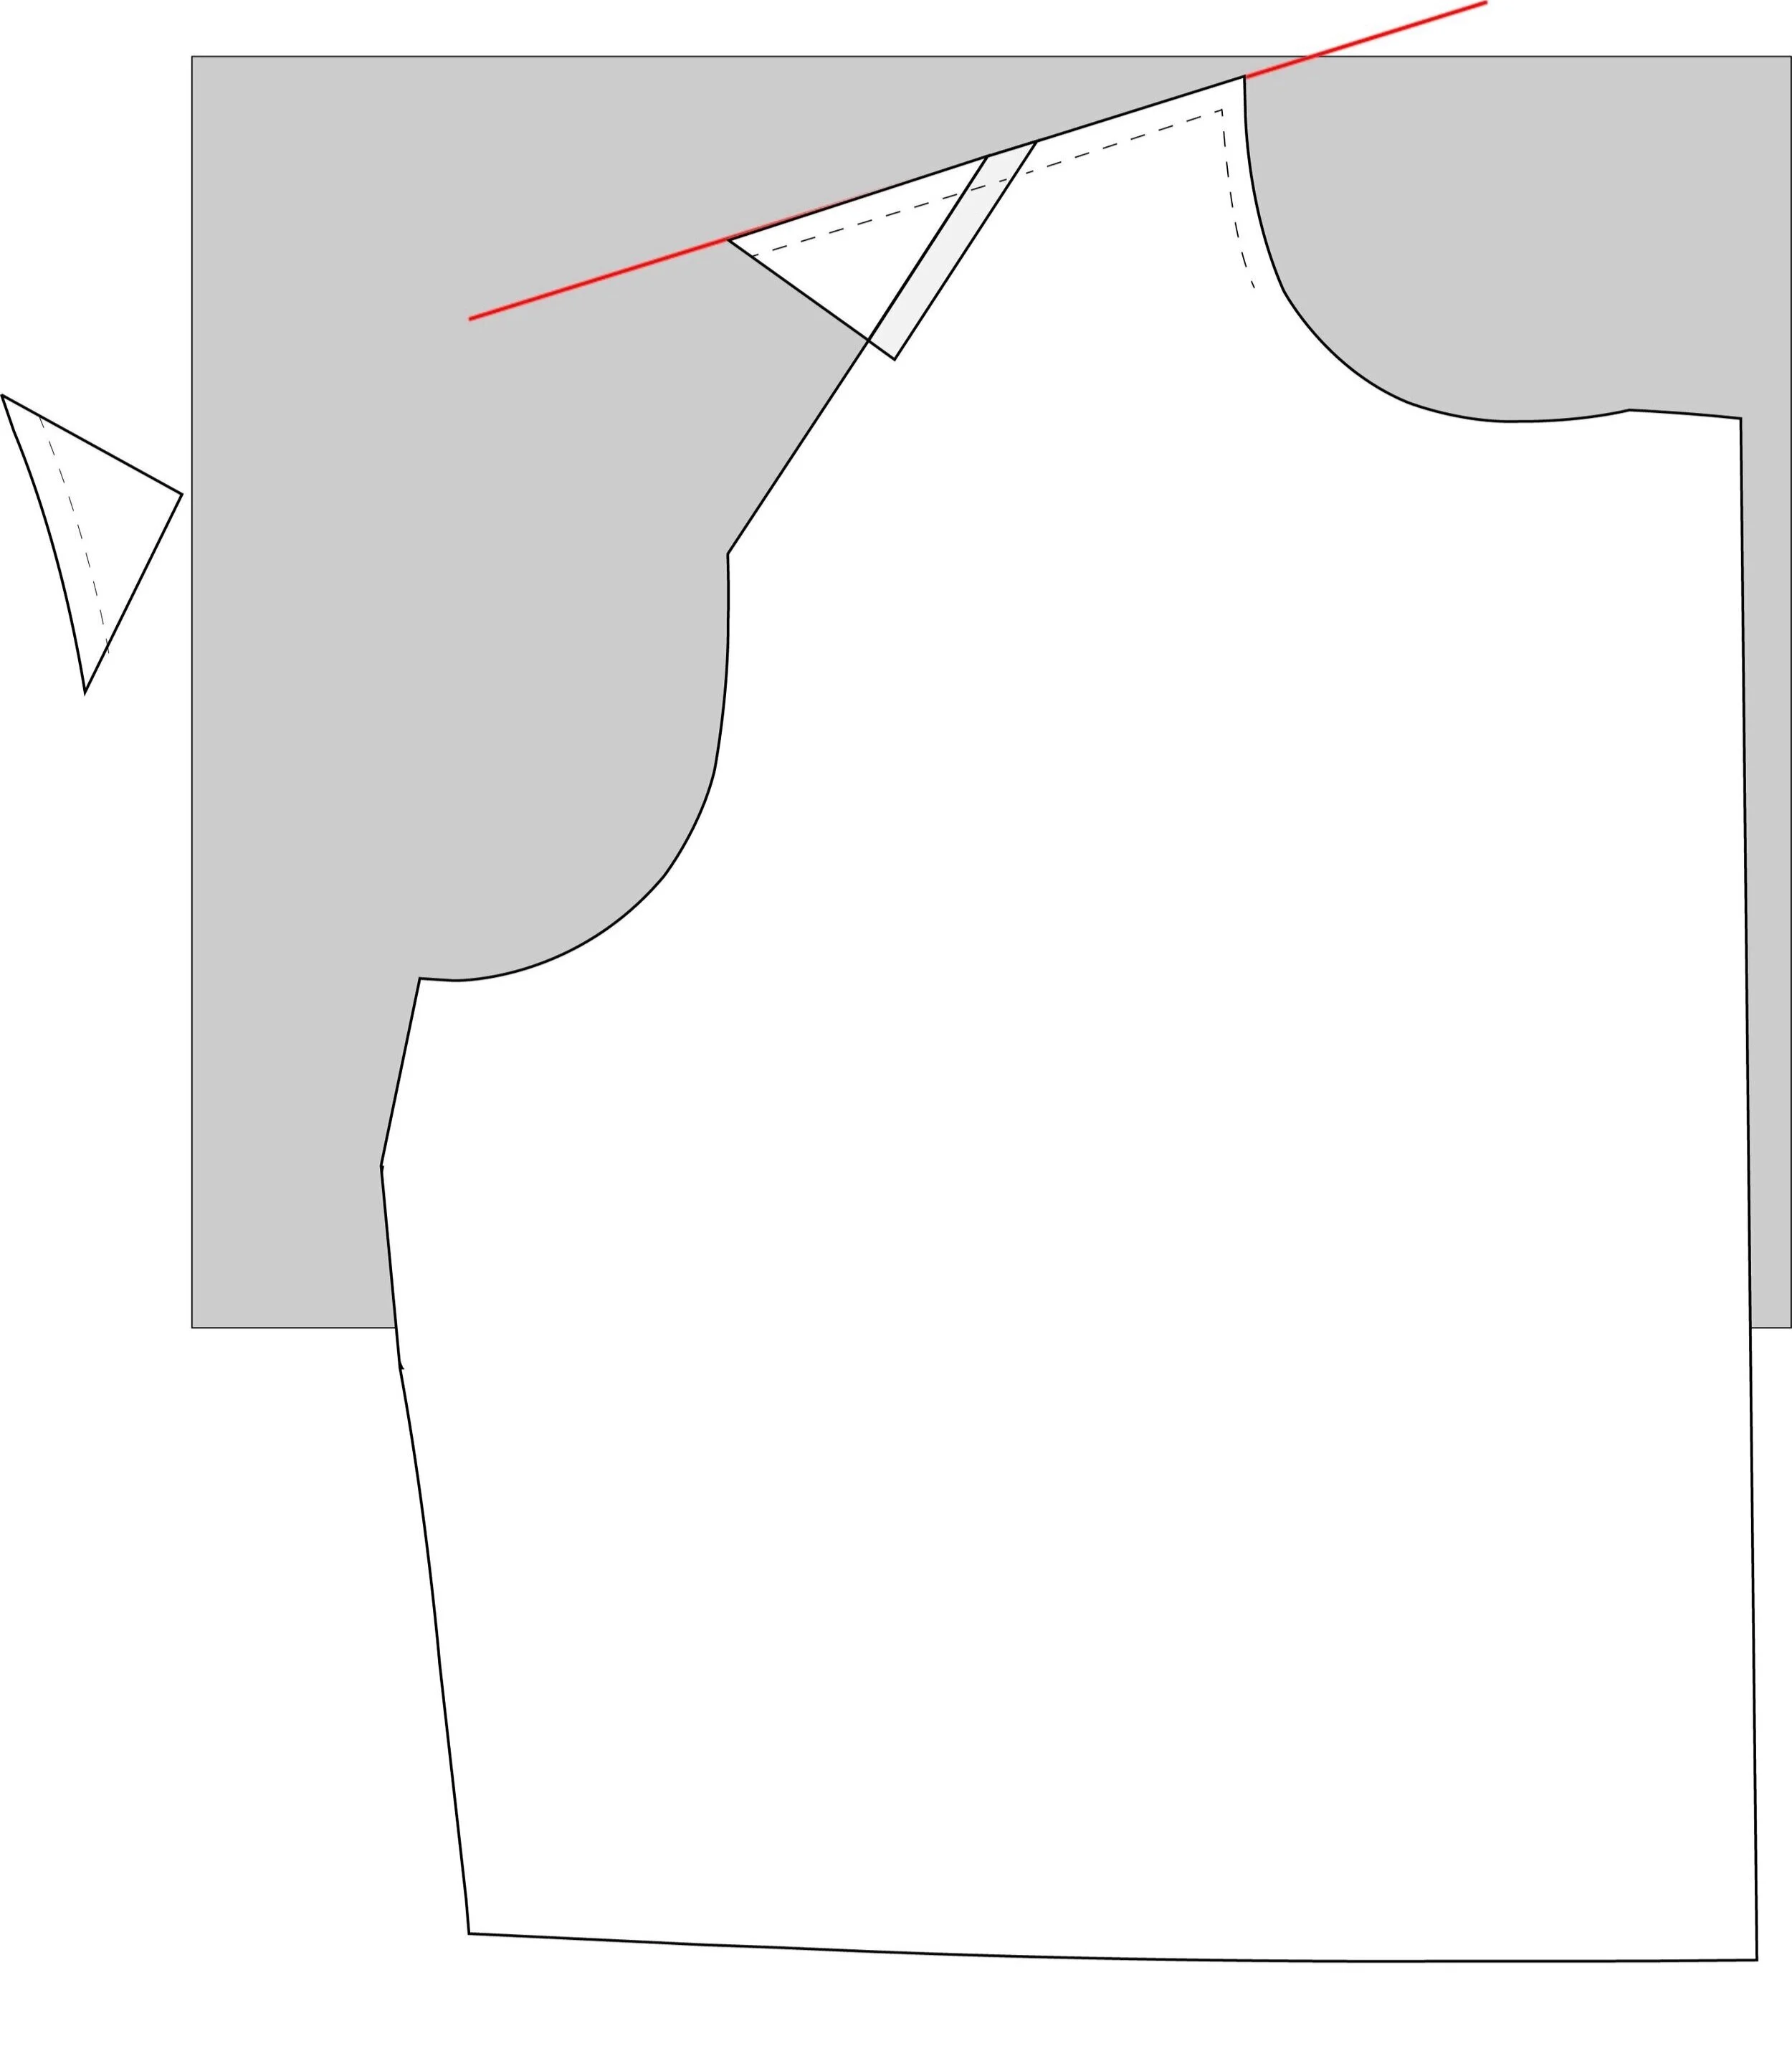
2. From your toile measure how much you want to shorten your shoulder. Place the shoulder cut out on the new shoulder line and slide it towards the neck. Stick into place

3. Following the seam allowance lines line up the armhole cut out. The seam allowance will be edge to edge on the shoulder point and the armhole. The pattern pieces will overlap slightly onto the main bodice as the sketch. Tape into place

4. Draw in a new curve on the front armhole

5. Cut out your pattern piece

6. Repeat on the back bodice. It’s really important to remember to do both the front and the back bodice to ensure your shoulder seams match
As always if you have any questions as you sew please get in touch. We’re always here to help.